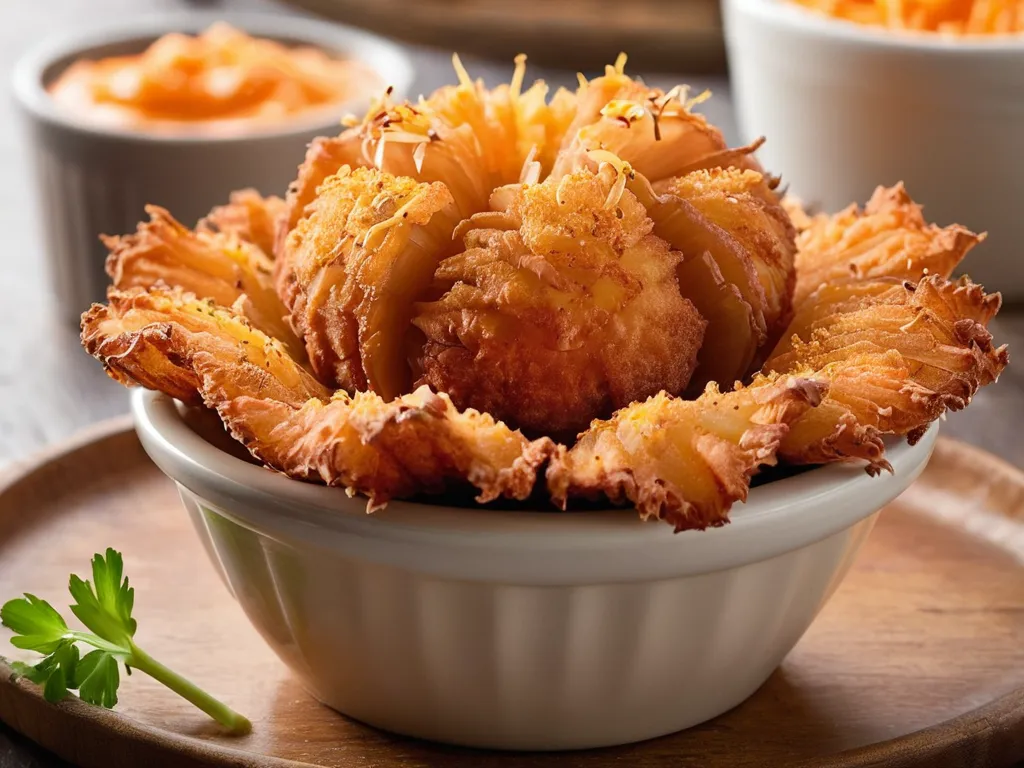
Copycat Outback Bloomin’ Onion
The Outback Steakhouse Bloomin’ Onion is one of the most recognizable appetizers in American restaurant history — a whole onion cut into dozens of petals, battered, and deep-fried into a golden, flower-shaped centerpiece that weighs nearly two pounds and lands on the table like a showstopper.
It was invented by Tim Gannon, one of Outback’s co-founders, when the chain opened its first restaurant in Tampa, Florida on March 15, 1988. Gannon’s background was in New Orleans Cajun cooking, and the dish reflects that: a Japanese garnish-style cutting technique combined with a Cajun-spiced batter. The “Outback” and Australian theme came from the Crocodile Dundee movie — the Bloomin’ Onion itself has nothing to do with Australia.
The dish became so iconic that by 1991 Outback commissioned a dedicated onion-cutting machine to meet demand. Today, Outback uses 14 million pounds of onions per year for this dish alone, serves over 8 million Bloomin’ Onions annually, and the dish has reportedly generated over $1 billion in worldwide sales. Outback’s parent company is literally named Bloomin’ Brands.
The original Outback version contains approximately 1,950 calories, 155 grams of fat, and 3,840 milligrams of sodium for the entire appetizer including the dipping sauce (the onion alone, without sauce, runs roughly 1,700 calories and 116 grams of fat) — numbers that cemented its reputation as one of the most indulgent starters in casual dining. This copycat version can be made in a home kitchen with one pot of oil, a sharp knife, and a thermometer. It requires patience, not skill.
TL;DR: Slice the top off a large sweet onion. Make 16 evenly-spaced cuts from near the top down to ½ inch above the root. Soak in ice water 30 minutes to bloom the petals. Double-dredge in seasoned flour, refrigerate to set the batter, then fry at 375°F for 7–9 minutes. Make the Bloom Sauce while it fries. Serve immediately.
The Onion You Need
Size is more critical than variety. You want the largest sweet onion you can find — at least 3½ inches in diameter, preferably 4 inches or more. Vidalia onions (from Toombs County, Georgia, the only region allowed to use the name) are the classic choice. Walla Walla onions from Washington State are equally good. Large generic sweet onions from any grocery store work fine.
Why sweet onions specifically? They have a lower sulfur content than standard yellow onions. This translates to milder, more pleasant flavor when raw and a sweeter, more caramelized character when fried. Yellow onions work but will taste sharper. Red onions are not a good substitute — the anthocyanins that give them their color react with heat and acid in the batter unpredictably.
If you can only find medium sweet onions (3 inches or under), buy two and make them separately. A small onion doesn’t have enough outer layers to create the dramatic bloom effect, and the petals will be too thin to hold batter properly.
The Cutting Technique
This is the step most home cooks rush, and it’s where most failures begin.
Place the onion cut-side down (stem end down) on a stable cutting board. The root — the flat fibrous end — stays intact. It’s the only thing holding all those petals together.
Make the first cut: start ½ inch from the root and slice straight down through the onion, stopping when the blade is ½ inch from the cutting board (which corresponds to about ½ inch from the root). Don’t cut through the root. Rotate the onion 180° and make a second cut parallel to the first. You now have the onion quartered. Rotate 90° and quarter each section. You now have 8 sections. Quarter those, and you have 16.
The goal is 16 evenly-spaced cuts. If the sections are uneven, some petals will be thick (won’t cook through) and some will be paper-thin (will burn). A visual check: when you look at the onion from above, the cuts should look like the spokes of a wheel, radiating out evenly from the root center.
After cutting, gently place the onion cut-side down and press firmly with your palm. The outer petals will begin to separate. Don’t force them further — the ice water will do that.
The Ice Water Soak: Why It Matters
Submerge the cut onion in ice water, cut-side down, for 30 minutes.
This is not optional. The cold water does two things: it firms the onion’s cell structure, which helps the petals hold their shape during frying; and it causes the petals to splay outward and downward, creating the bloomed flower shape. Without the soak, the petals stay tightly compressed against each other. The batter can’t get between them. You end up with an onion ball, not a bloom.
After soaking, invert the onion onto a clean kitchen towel or paper towels and pat dry. Get into every petal. Any moisture left on the surface will steam rather than fry when it hits the hot oil — steam is what makes batter slide off.
The Double-Dredge (and Why the Batter Falls Off)
Batter falling off is the most common complaint, and it almost always traces to one of four causes:
1. Wet onion. After the ice water soak, moisture between the petals prevents the flour from adhering. Pat dry obsessively.
2. Skipping the refrigeration step. After the second flour coating, the batter needs 15–30 minutes in the refrigerator to hydrate and bond. The flour absorbs the egg wash and forms a coherent shell around each petal. Skip this and the coating hasn’t set when it hits the oil — it detaches in the first 30 seconds of frying.
3. Oil temperature too low. At 350°F or below, the batter absorbs oil for several seconds before it sets. During those seconds, it sags and pulls away from the onion. At 375°F, the exterior of the batter sets within 10–15 seconds of contact with the oil, before it can separate.
4. Excess flour. After each flour coat, shake the onion firmly over the bowl. Loose flour clumps into paste when it hits the hot oil, and those clumps break free and take the surrounding batter with them.
The cornstarch in this recipe is not in every copycat version, but it matters. Cornstarch inhibits gluten development in the coating, which means the batter stays light and crispy rather than turning dense and chewy during frying. The ratio here — about 1 part cornstarch to 7 parts flour — is enough to make a difference without changing the texture significantly.
Frying: Temperature Is Everything
Preheat your oil to exactly 375°F before the onion goes in. Not “medium-high” — check it with a thermometer.
At 350°F, the batter soaks up oil and falls off. Below 325°F, you get a greasy, pale coating that never crisps.
At 375°F, the exterior sets quickly, the steam created inside the batter puffs the coating slightly, and the oil doesn’t penetrate into the layers. You get the crispy exterior and the faintly-steamed onion interior that defines the Outback version.
At 400°F or above, the outer petals burn before the inner ones cook and before the thick base of the onion heats through.
Lower the onion into the oil petals-down. The wide, flat surface area of the petals contacts the oil first, which creates even crisping across the entire bloom. Fry petals-down for 4–5 minutes, then flip carefully and fry the root side for 3–4 more minutes until the entire surface is deep golden-brown. “Light golden” is undercooked — the batter should be the color of a well-done french fry.
The Bloom Sauce
Outback calls it “Spicy Dipping Sauce” on the menu, but fans have always called it Bloom Sauce. It’s a seasoned mayo-and-sour-cream hybrid — not quite a cocktail sauce, not quite a remoulade. The sour cream is what most home copycats miss; it adds tang and lightens the richness of pure mayo.
The key ratio: the horseradish should punch through the base, but the sauce should still read as creamy and mild. Two tablespoons of creamy horseradish sauce to ½ cup total base (¼ mayo + ¼ sour cream) hits that balance. Prepared horseradish is sharper and more pungent — if that’s what you have, start with 1 tablespoon and taste before adding more.
The ketchup is a background ingredient. It adds sweetness and a slight tomato acidity, but you shouldn’t be able to taste it as ketchup — 2 teaspoons in ½ cup of base disappears entirely. Don’t add more.
Make the sauce before you start prepping the onion. Refrigerating it for at least 30 minutes lets the dried spices hydrate and bloom, which deepens the flavor significantly. Cold sauce is also a better contrast against the hot onion.
Common Mistakes
Using an underpowered pot. The onion is large and the oil temperature will drop when it goes in. A wide, heavy pot (Dutch oven, cast iron) recovers faster than a thin-walled saucepan. Don’t use a pan that’s too narrow — the petals need clearance on all sides.
Not using a thermometer. Frying by feel is the fastest way to ruin this. Thermometers for frying cost $10 and are essential for this recipe. Get one.
Frying from cold. The refrigeration step (to set the batter) is for 15–30 minutes, not 2 hours. A very cold onion will drop the oil temperature more dramatically and may not cook through evenly. Remove from the fridge 5–10 minutes before frying if it’s been in longer than 45 minutes.
Serving late. A fried onion starts losing its crunch the moment it’s out of the oil. Steam from the interior slowly softens the coating from the inside. Serve within 5 minutes of coming out of the fryer — no exceptions.
Air Fryer Version
It works, and the flavor is remarkably similar. The texture is different: lighter coating, less dramatic crunch, petals near the center won’t crisp as much as the outer ones. But if you don’t want to heat 4 inches of oil, this is a real option.
After the second flour coat and refrigeration step, spray every surface of the battered onion with cooking oil spray — cover every petal, including those compressed toward the center. Place in the air fryer basket petals-up. Air fry at 400°F for 10 minutes, then carefully flip (or rotate the basket if your fryer design allows) and cook for another 8–10 minutes until deep golden-brown.
The oil spray is not optional in the air fryer version — it’s the only fat available for crisping. Without it, the outer flour will just dry out instead of frying.
How It Compares to the Restaurant
A full Outback Bloomin’ Onion contains approximately 1,950 calories, 155 grams of fat, and 3,840 milligrams of sodium with the sauce — the whole appetizer, typically shared by four people. At four servings, that’s roughly 490 calories per person before the steak arrives.
Don’t assume the homemade version is automatically lighter. Home deep-frying still soaks the batter in oil, and our per-serving estimate (about 800 calories with sauce) can actually edge past the restaurant’s per-person number — a battered, fried whole onion is indulgent no matter whose kitchen it comes out of. What you do control at home is the salt (the restaurant version’s 3,840 mg of sodium is the hardest number to match) and the freshness. Serve it as the occasion it is.
If you want something in the same spirit with less oil involvement, the air fryer version cuts the fat substantially. Or try Outback’s Aussie Cheese Fries for a different but equally iconic restaurant recreation.
Other Restaurant Copycat Appetizers
If you’re building a full restaurant-style spread, the Bloomin’ Onion pairs well with other copycat appetizers. Chili’s Southwestern Egg Rolls follow a similar deep-fry logic with a spiced chicken and vegetable filling. Buffalo Wild Wings Garlic Parm Wings cover different flavor territory but use the same high-heat frying principles. For a lighter counterpoint, Red Lobster Biscuits are baked and still feel like a restaurant moment.
Frequently Asked Questions
What is Outback’s Bloom Sauce made of? A mayo-horseradish base with ketchup, smoked paprika, garlic powder, dried oregano, cayenne, and black pepper. See the sauce recipe in the ingredients above — it’s a five-minute mix.
Why did my onion turn out soggy? Most likely the oil temperature dropped when the onion went in, or you let the fried onion sit too long before serving. Check oil temp with a thermometer and serve within 5 minutes.
Can you prep the onion ahead? Yes — cut the onion, soak it in ice water, dry it, and apply the batter up to 2 hours ahead. Keep in the refrigerator until ready to fry. Don’t batter more than 2 hours ahead; the moisture from the onion will eventually work through the batter.
Do I need buttermilk? Buttermilk’s acidity helps the batter adhere and contributes a faint tangy note. If you don’t have it: combine 1 cup whole milk with 1 tablespoon white vinegar or lemon juice, stir, and let sit 5 minutes.
Is there a sweet onion substitute? Yellow onion works but is sharper. Do not use white onion — the sulfur content is too high and it will taste harsh after frying. If you’re in a pinch, a yellow onion soaked in the ice water for 45 minutes (instead of 30) will mellow somewhat.