Pin It

Viral TikTok 2-Minute Chocolate Mug Cake

Viral TikTok 2-Minute Chocolate Mug Cake
Jump to Recipe
Prep 3 min Cook 90 sec Serves 1
Quick answer: This chocolate mug cake takes 5 minutes total — 3 to mix, 90 seconds to cook. The recipe works with pantry staples (flour, cocoa, sugar, oil, milk) and produces a genuinely moist, tender cake when you stop cooking while the top still looks slightly underdone. The key rules: use oil not butter (butter's water content makes it rubbery), cook to your microwave's wattage (900W = 1:20–1:30; 1000W = 1:10–1:20), and rest for 60 seconds before eating. The lava center version requires nothing special — freeze a tablespoon of Nutella, press it into the batter before microwaving, done.
Viral TikTok 2-Minute Chocolate Mug Cake

Viral TikTok 2-Minute Chocolate Mug Cake

The chocolate mug cake that actually tastes like cake — not a rubber puck. The correct oil-to-flour ratio, the wattage timing guide, and the Nutella lava-center trick. Ready in 2 minutes from pantry staples.

Easy Prep: 3 min Cook: 90 sec Total: 3 min1 servings ~$3.15/serving
Prep3 min
Cook90 sec
Total3 min
Servings
1
At home~$3.15/serving
vs
Restaurant~$14.17/serving
You save ~78%

Ingredients

Instructions

💡
Pro tip: This recipe tastes even better the next day. The flavors need time to meld together in the fridge.
❄️
Storage: Keeps in an airtight container in the fridge for up to 2 weeks. Freezer-friendly for up to 3 months.
~350-550 cal/serving · Rich & Indulgent🔥

The Story Behind the Recipe

Most late-night chocolate cravings get answered with whatever’s already open in the cabinet. The chocolate mug cake is the better answer: actual cake, one mug to wash, ready in the time it takes to find the chocolate chips you thought were in the back of the pantry.

TL;DR: Whisk 4 tbsp flour + 3 tbsp sugar + 2 tbsp cocoa + 1/4 tsp baking powder + pinch salt in a large mug. Add 3 tbsp milk + 2 tbsp vegetable oil + 1/2 tsp vanilla. Stir 15–20 strokes. Fold in 1 tbsp chocolate chips. Microwave at 900W for 1:20–1:30 (adjust for your wattage). Rest 60 seconds. The top should look just-set when you pull it out — residual heat finishes the center. Use oil, not butter. Don’t overcook.

The History of the Mug Cake

The mug cake predates TikTok by more than a decade. By 2008, the recipe was already circulating widely enough that King Arthur Flour published one in its magazine and noted it “was already making the rounds” — meaning even at that early point, no one could trace it to a single origin. A 2009 YouTube video brought the format to its first mass audience, and the poster attributed it to an email forward she’d received, which tells you something about how internet food culture worked before social media. The format got its first comprehensive print treatment in 2013, when Certified Master Baker Leslie Bilderback published Mug Cakes: 100 Speedy Microwave Treats to Satisfy Your Sweet Tooth (St. Martin’s Griffin) — 100 variations in one volume, proof there was a real audience for the concept years before short-form video existed.

What TikTok did, starting around 2020, was solve the texture problem at scale. No single creator owned the breakthrough — instead, thousands of independent experiments ran in parallel, with failures documented alongside successes. The community converged on a handful of critical variables: oil over butter, stopping short of the “done” look, using an oversized mug, and calibrating the cocoa-to-flour ratio. That collective refinement is what made the TikTok mug cake genuinely good rather than just quick.

Why Mug Cakes Go Rubbery — and How to Avoid It

Rubberiness is the only real failure mode in a mug cake, and it has three causes.

Overcooking is the most common. A microwave heats by exciting water molecules throughout the food simultaneously — a process called dielectric heating. Unlike a conventional oven, which heats from the outside in, the microwave generates heat through the entire interior at once. Once the moisture evaporates, the proteins from the flour’s gluten tighten and the cake becomes dense and chewy. The margin is narrow: at 900W, the difference between “just done” and “rubber puck” is about 15 seconds. Pull the mug when the top still looks slightly underdone and let residual heat finish the job.

One thing to know: mug cakes will always look pale and have no crust on the outside, even when perfectly cooked. This is normal. The Maillard browning reaction that gives baked goods their brown exterior requires surface temperatures above about 280–300°F — a temperature the mug’s exterior never reaches in a microwave. The pale surface is not a sign of undercooking. Judge doneness by the top’s texture (just-set, not wet or shiny), not by color.

Butter instead of oil is the second most common cause. Butter is roughly 80% fat and 20% water. In the microwave, that water turns to steam and escapes the cake — leaving the structure tighter and the crumb drier. Vegetable oil is 100% fat with no water content. It coats the gluten strands and keeps them lubricated throughout cooking, which is why oil-based mug cakes stay consistently moist and butter-based ones go chewy.

Overmixing develops gluten. Fifteen to twenty strokes until the batter is smooth is enough. More than that and the flour proteins start linking into a tighter network that contracts more aggressively when cooked.

The Wattage Guide

Most mug cake recipes say “microwave 90 seconds to 2 minutes” without accounting for microwave wattage, which varies from 700W to 1200W in standard home models and causes wildly different results. The wattage is printed on the label inside the door.

700W: 1:50–2:00 minutes 800W: 1:35–1:45 minutes 900W: 1:20–1:30 minutes (most common U.S. home microwave) 1000W: 1:10–1:20 minutes 1100W: 1:05–1:10 minutes 1200W: 0:55–1:05 minutes

At all wattages: stop when the top looks just-set and slightly dull — not wet, not fully dry. Let it rest one minute before eating. If you’re unsure of your wattage, start at the shorter time and add 10 seconds.

Natural vs Dutch-Process Cocoa: Which to Use

Not all cocoa powder is the same, and the difference matters more in a mug cake than in a full-size baked recipe because every gram affects a single serving.

Natural cocoa powder is acidic (pH around 5.3–5.8). It has a sharp, bright chocolate flavor and a lighter reddish-brown color. Natural cocoa reacts with baking soda (an alkaline base) to produce carbon dioxide for leavening — which is why recipes using it often call for baking soda.

Dutch-process cocoa (also called alkalized cocoa) has been treated with an alkalizing agent to neutralize its acidity, bringing it to a near-neutral or slightly alkaline pH (roughly 6.8–8, depending on how heavily it’s alkalized). This produces a darker, deeper color and a milder, less bitter chocolate flavor. Because Dutch-process cocoa has no residual acidity, it cannot activate baking soda — it needs baking powder (which contains its own acid) to leaven.

This recipe uses baking powder, which makes it compatible with either cocoa type. But Dutch-process will give you a darker, richer-looking mug cake with a slightly more “restaurant” appearance and deeper flavor. Brands sold as Dutch-process: Droste, Valrhona, King Arthur (black cocoa), Guittard. Standard supermarket options (Hershey’s Natural, store brands) are natural cocoa.

The shortcut is on the container: if it says “processed with alkali” or “Dutch-process,” it’s the neutralized version. If it says only “unsweetened cocoa,” it’s natural. Swapping them in recipes that rely on a specific leavening reaction can cause flat cakes or a soapy, off flavor — but in this recipe, the baking powder handles leavening regardless of which you choose.

Choosing Your Mug

The mug is not a neutral vessel — it affects how the cake cooks.

Ceramic (standard coffee mug): The best choice. Dense ceramic walls absorb a small amount of microwave energy but distribute heat fairly evenly around the batter. The thick walls provide insulation so the exterior stays safe to handle. Most standard 12–14 oz ceramic mugs work well. Avoid mugs with metallic glazes, metallic rims, or embedded metal decoration — they will arc in the microwave.

Borosilicate glass (like Pyrex measuring cups): Good second choice. You can see through the walls to watch the batter rise, which helps with timing. Glass conducts heat more readily than ceramic, so the sides of the mug can get very hot — use a towel or oven mitt. Standard glass labeled “microwave-safe” is fine; non-tempered glass is a thermal shock risk and should be avoided.

Plastic: Only use containers specifically labeled “microwave-safe.” Generic plastic cups or to-go cups are not designed for sustained microwave heat and may leach compounds into food at elevated temperatures. Even “microwave-safe” plastic doesn’t perform as well as ceramic for baking.

Paper/Styrofoam cups: Not suitable. Paper cups have internal liners (polyethylene or wax) designed for cold or briefly warm drinks, not sustained microwave heat. Styrofoam melts. Skip both.

Size is more important than material: the 12–14 oz minimum is non-negotiable. A standard 10 oz coffee mug will overflow. A wide, shallow mug (like a soup or latte mug) may cook faster than the times in this guide because the batter depth is shallower — reduce cooking time by 10–15 seconds.

The Lava Center Version

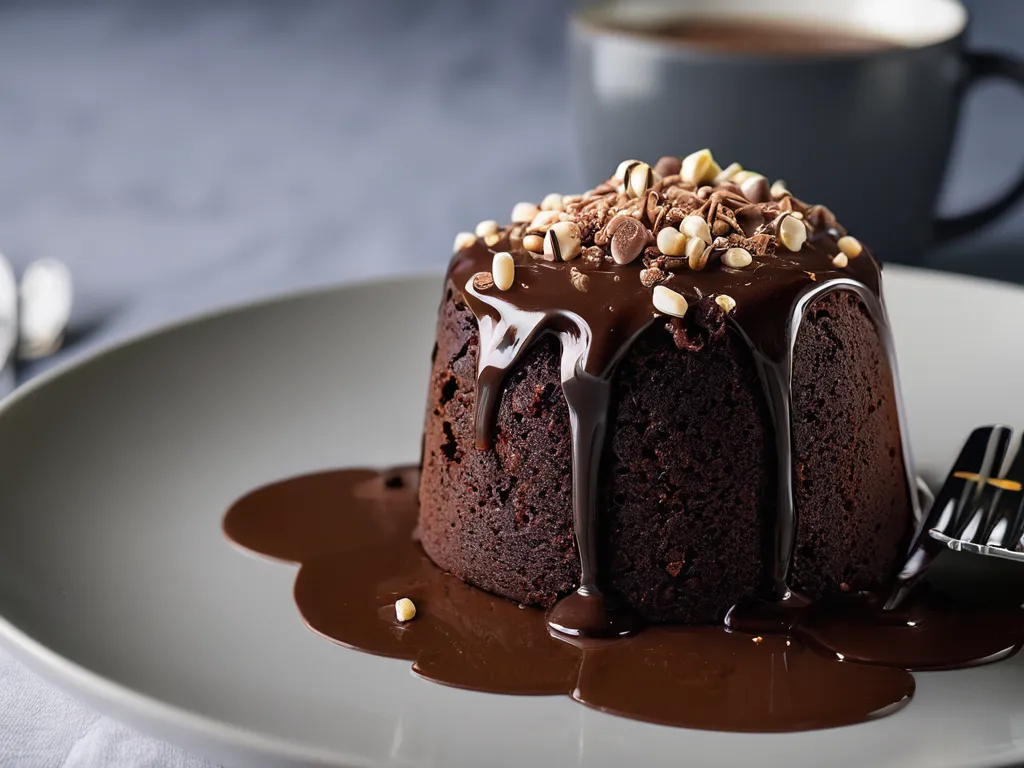
The most popular mug cake upgrade on TikTok requires no special ingredient. Spoon 1 tablespoon of Nutella onto a small piece of plastic wrap, twist it into a tight ball, and freeze for 30 minutes. Press the frozen Nutella ball into the center of the prepared batter so it’s fully submerged. Microwave as normal. The batter around it cooks while the dense frozen center stays molten and flows when you break through the surface.

A simpler (but less dramatic) version: press 5–6 chocolate chips into the center of the batter with your fingertip before microwaving. They won’t form a liquid pool, but they’ll stay soft and gooey rather than melting into the batter. For a true flowing center like the Chili’s Molten Lava Cake or the Domino’s Lava Cake, the frozen Nutella ball method is the right approach.

Variations Worth Making

Peanut butter swirl. After mixing the batter, drizzle 1 tablespoon of peanut butter across the top of the batter in a zigzag, then drag a toothpick through it once. Microwave as normal. The peanut butter ripples through the top layer of the cake.

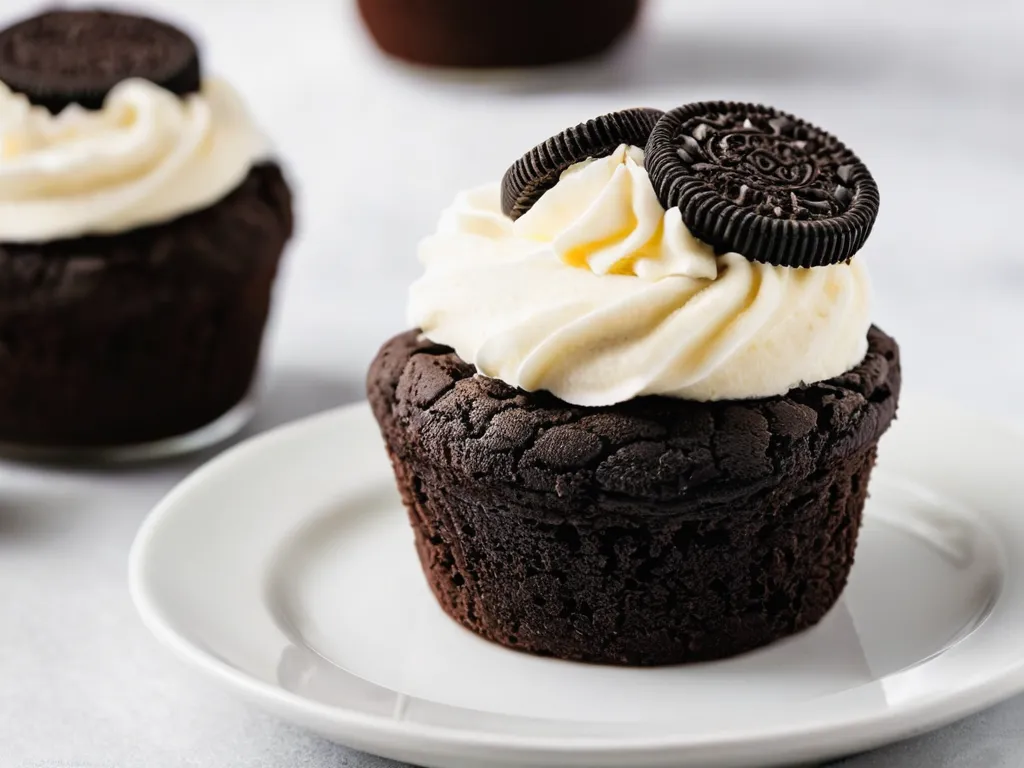
Oreo chocolate mug cake. Crush 4 Oreos into small pieces and fold half of them into the batter alongside the chocolate chips; press the other half into the top surface before cooking. For a version built entirely around the cookie, see the dedicated Oreo Mug Cake.

Red velvet. Add 1/4 teaspoon white vinegar and a few drops of red food coloring to the batter. Replace 1 tablespoon of flour with 1 tablespoon of cocoa powder (less cocoa for a lighter red base). Top with a spoonful of cream cheese softened with a pinch of sugar.

Mexican chocolate. Add 1/4 teaspoon cinnamon and a pinch of cayenne to the dry ingredients. The cinnamon-chocolate-heat combination mirrors a Churro Mug Cake-adjacent flavor; see also the Churro Mug Cake for a pure cinnamon-sugar version.

Espresso chocolate. Add 1/2 teaspoon instant espresso powder to the dry ingredients. It amplifies the cocoa flavor without making the cake taste like coffee — the effect is a darker, more intense chocolate, not a mocha.

Toppings, Ranked

Vanilla ice cream. The definitive choice. The temperature contrast between hot cake and cold ice cream creates a sauce effect as the ice cream melts into the mug around the cake. Nothing else does this.

Warm peanut butter drizzle. Microwave 1 tablespoon of peanut butter for 10 seconds, stir, and pour over the top. The fat in the peanut butter keeps it pourable and the combination is better than it has any right to be.

Whipped cream + cocoa powder. Standard but effective. The bitterness of the cocoa dusted over sweet whipped cream adds complexity.

Fresh strawberries. Underrated. The acidity of cold strawberries against hot chocolate cake is genuinely interesting. Pairs well without being too sweet.

Nutella. A spoonful pressed into the center of the finished cake immediately after microwaving will partially melt from the residual heat, creating a not-quite-lava but very good gooey layer at the bottom.

Troubleshooting
ProblemLikely CauseFix
Overflowed in the microwaveMug too small — the batter nearly doubles in height as air expandsUse a 12 oz mug minimum; 14 oz is more forgiving; set a plate under the mug as a catch
Rubbery, tough textureOvercooked, butter used instead of oil, or overmixed batterReduce cook time by 10–15 seconds; switch to neutral vegetable oil; stop stirring after 15–20 strokes
Dry and crumblyToo much flour (common when scooping directly from bag) or overcookedSpoon flour into the tablespoon — don’t pack it; add 1 extra tablespoon milk to the ratio
Gummy and denseDry ingredients under-mixed (cocoa lumps stay dry) or too much oilWhisk all dry ingredients together thoroughly before adding any liquid
Sunken centerUndercooked — center didn’t setAdd 10–15 seconds and rest another 60 seconds before eating
Pale, no crustNormal — microwaves cannot reach the 280°F+ surface temperature needed for Maillard browningAdd a dusting of cocoa powder or a drizzle of chocolate sauce; the color has no effect on taste
Bland chocolate flavorLow-quality cocoa or insufficient cocoa depthSwitch to Dutch-process for darker flavor; add 1/2 tsp instant espresso powder (amplifies cocoa, adds no coffee taste)
Tastes eggy or spongyAdded egg when the recipe doesn’t call for oneEgg proteins tighten under microwave heat; omit the egg entirely
Make-Ahead and Storage

A mug cake is designed to be eaten immediately — it’s not a recipe that keeps. Once cooked, the cake begins to dry out and stiffen within 20–30 minutes as the residual steam dissipates. Reheating a cooked mug cake just finishes the overcooking it’s already started. There’s no meaningful way to store a finished mug cake.

What you can do: pre-mix the dry ingredients. Combine 4 tbsp flour + 3 tbsp sugar + 2 tbsp cocoa + 1/4 tsp baking powder + pinch salt in a small jar or zip-lock bag. Label it with the wet ingredients needed (3 tbsp milk + 2 tbsp oil + 1/2 tsp vanilla). The dry mix keeps at room temperature for months — it’s just pantry staples. When the craving hits, open the jar, add the wet ingredients directly, stir, and microwave. Total time: about 3 minutes.

This dry-mix approach also makes a genuinely good small gift: fill a 4 oz mason jar, attach a card with the wet ingredient instructions, and the recipient has a “mug cake kit” that requires nothing beyond the jar and a mug.

The Bottom Line

The mug cake earns its place as a go-to recipe because it actually works — it’s not a novelty. One mug to wash, pantry staples, ready in 5 minutes, and when you get the oil-to-flour ratio right and stop cooking at the right moment, it’s a genuinely good chocolate cake, not a compromise. The two things that trip people up consistently are microwave wattage and using butter: use the wattage guide above, use oil, and the rubber-puck era of mug cakes is behind you.

Nutrition Facts

Per serving (1 servings)
Calories600
Total Fat33g
Total Carbs68g
Dietary Fiber4g
Sugars46g
Protein7g
Sodium350mg

* Estimated values based on standard recipe preparation. Actual values may vary.

🥗

Make It Healthier

Love Viral TikTok 2-Minute Chocolate Mug Cake but want a lighter version? Try these simple swaps:

  • Reduce sugar to 2 tablespoons — the chocolate chips provide enough sweetness in most bites, and cocoa powder has a naturally bitter depth that doesn't need as much sugar as you'd think.
  • Swap vegetable oil for 2 tablespoons plain Greek yogurt — the yogurt still keeps it moist and adds about 2g of protein per serving.
  • Use 1 tablespoon dark cocoa powder (Dutch-process) and 1 tablespoon regular cocoa for a more intense chocolate flavor without adding sugar or fat.
  • Skip the chocolate chips and press one small square of 70% dark chocolate into the center before cooking — you get a genuine molten center at about half the added sugar of chips.
  • Add 1 tablespoon of full-fat mayonnaise to the batter (reduce oil by 1 tbsp to compensate) — mayo is emulsified oil and egg yolk, which coats flour to limit gluten development and adds richness without the water in butter that causes rubberiness. King Arthur Baking validated this technique in a 2023 post; Hellmann's has published mayo-based cake recipes since the 1930s.

Equipment You'll Need

12–14 oz microwave-safe mug

Oversized — the batter rises nearly to double its starting height during cooking. A standard 10 oz mug will overflow.

Fork

For mixing — the tines help break up cocoa clumps better than a spoon

Frequently Asked Questions

Why does my mug cake come out rubbery?

Overcooking is the primary cause — the margin between done and rubbery is about 15 seconds. The second most common cause is using butter instead of oil. Butter is roughly 20% water, which evaporates in the microwave and leaves the cake proteins tighter and drier. Vegetable oil has zero water content and stays liquid, coating the gluten strands and keeping the crumb tender. A third cause is over-stirring the batter — excessive mixing develops gluten, which tightens as it cooks. Stir just until smooth, about 15–20 strokes, then stop.

What size mug do I need for a mug cake?

At minimum a 12-ounce mug; 14-ounce is better. The batter (which starts about 1.5 inches deep) rises to nearly double height as air expands in the microwave. In a standard 10-oz coffee mug, it overflows reliably. In a 12-oz mug with a narrower mouth, you'll have about a half-inch of clearance. If you only have a small mug, set it on a plate lined with a paper towel to catch any overflow — but buy a larger mug for next time.

How do I adjust cooking time for my microwave's wattage?

Most microwaves run between 700W and 1200W. At 700W, cook 1:50–2:00 minutes. At 900W (most home microwaves), cook 1:20–1:30. At 1000W, cook 1:10–1:20. At 1200W, cook 55–65 seconds. If you don't know your wattage, check the label on the inside of the door. When in doubt, start at the shorter time and add 10 seconds. The top should look just-set with a slight sheen — not wet, not dry.

How do I make a molten lava center?

Spoon 1 tablespoon of Nutella or peanut butter onto a small piece of plastic wrap, roll it into a ball, and freeze for 30 minutes. Once frozen, press the ball into the center of your prepared batter so it's fully submerged. Microwave as normal. The outside of the batter cooks while the frozen center stays molten. Alternatively, press 4–5 chocolate chips into the very center of the batter (not folded in, just pressed down with a finger) — they won't fully melt into a flowing lava center, but they'll stay soft and gooey.

Can I use butter instead of vegetable oil?

You can, but the texture suffers. Butter is approximately 80% fat and 20% water. In the microwave, that water flashes to steam and escapes — leaving the cake drier and slightly tougher than the oil version. Oil is 100% fat with no water content, which is why it keeps mug cakes consistently moist. If you want a buttery flavor without the texture trade-off, use vegetable oil in the recipe and add a small pat of softened butter on top of the finished cake — you get the dairy richness as a topping rather than losing it to evaporation.

Do I need an egg in a mug cake?

No — and adding one often makes it worse. Whole eggs contain protein that coagulates in the microwave and can make the cake rubbery, particularly when cooked at higher wattages. The flour and small amount of baking powder provide enough structure for a single-serve cake cooked for under 2 minutes. The egg-free version in this recipe is more reliably tender than egg-containing versions across different microwave wattages. If you want extra richness without the egg texture risk, add 1 tablespoon of mayonnaise — the emulsified fat and egg yolk contribute moisture without the structural tightening of a whole egg.

What's the best topping for a mug cake?

A scoop of vanilla ice cream is the definitive answer — the temperature contrast between a hot mug cake and cold ice cream is genuinely better than either alone, and the ice cream melts into a sauce around the base of the cake. After that: whipped cream with a dusting of cocoa powder, a drizzle of warm peanut butter (microwave 1 tablespoon for 10 seconds), or a spoonful of Nutella pressed into the center. Powdered sugar is underwhelming on a mug cake — the moisture from the cake dissolves it immediately. Sliced fresh strawberries work surprisingly well with the hot chocolate.

Love this recipe? Share it!

Shop the tools

The right tools make all the difference. We earn a small commission if you buy through these links — at no extra cost to you.

Free PDF: our 12 most-wanted copycat recipes — instant download.

Ratings & Reviews

No ratings yet

Rate this recipe

Click a star to rate

Leave a Review

0/500

CS

Copycat Spices Test Kitchen

Every recipe on Copycat Spices is developed and tested in our home test kitchen. We reverse-engineer beloved restaurant dishes and refine each one until the flavors and the instructions work reliably for home cooks of all skill levels.

Learn more about our mission →