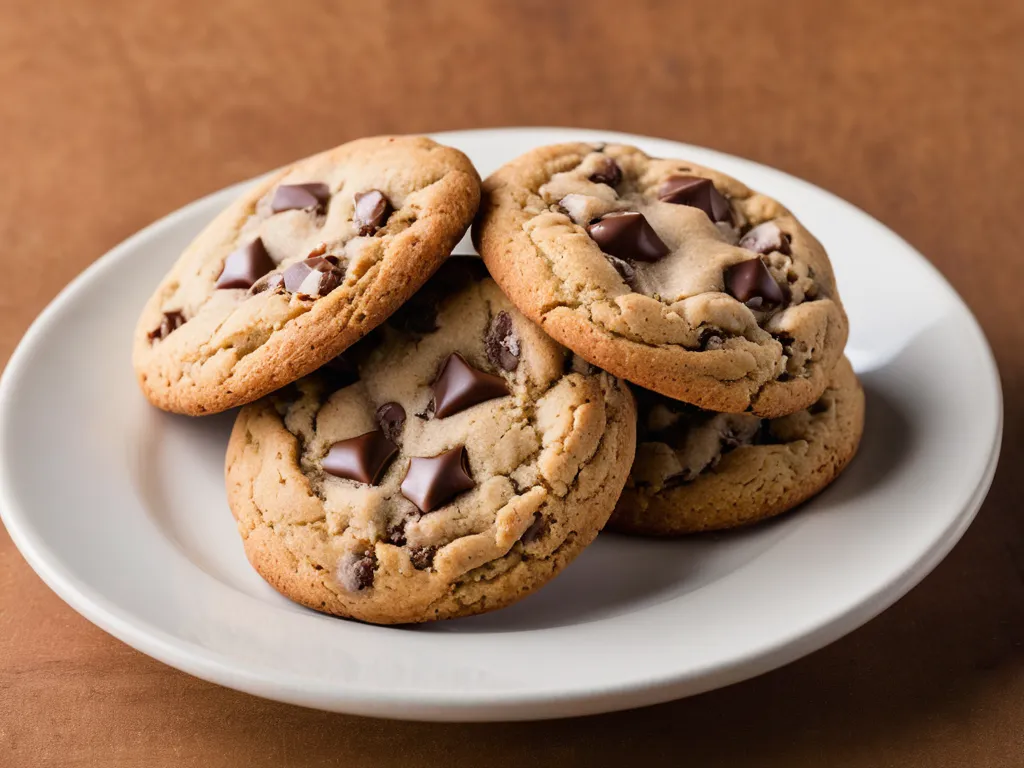
Brown Butter Chocolate Chip Cookies
The TikTok-era brown butter cookie didn’t invent a new recipe. It took the most-made cookie in American home kitchens and applied one principle from professional pastry technique: controlled browning. The result is a cookie that tastes dramatically better with only five extra minutes of work and no additional ingredients.
The trend accelerated around 2020-2022 when baking creators on TikTok started posting side-by-sides of standard chocolate chip cookies versus the browned-butter version. The color difference was obvious. The texture difference — pulled apart on camera to reveal the gooey chocolate stretch — was more obvious. The flavor difference viewers couldn’t see, but the comments told the story: people made them and came back to say they couldn’t go back.
TL;DR
Brown the butter until the milk solids are golden amber and smell like hazelnuts (5 minutes). Cool to room temperature. Whisk in sugars, eggs, extra yolk, and vanilla until satiny. Fold in flour, baking soda, salt, and chocolate. Chill the dough at least 30 minutes (overnight is better). Bake at 375°F for 10-12 minutes, pulling when the edges are set but the centers still look underdone. Salt immediately. Rest on the pan for 10 full minutes before touching them.
Four Techniques That Separate the Good from the Great
Most “elevated” cookie recipes are one or two techniques applied inconsistently. These four work together — each addresses a different failure mode of standard chocolate chip cookies.
1. Brown butter. Standard recipes cream room-temperature butter with sugar, which aerates the fat and produces a cakier, more uniform cookie. Brown butter is liquid when combined with sugar, which produces denser cookies with less air — and the Maillard browning of the milk solids adds the flavor complexity that standard butter cannot. The tradeoff (less lift, more density) is exactly what you want in a gooey, bakery-style cookie.
2. Extra egg yolk. Egg whites add protein that sets the cookie structure; egg yolks add fat and lecithin (an emulsifier). Extra yolk tilts the balance toward richness and fudginess rather than structure. The result is a cookie that stays soft in the center longer and has a chewier, more tender crumb.
3. Cold dough. Warm dough melts fast in a hot oven and spreads before the structure sets. Cold butter in the dough melts more slowly — the proteins have time to set the shape before the fat pools outward. The chill also fully hydrates the flour, improving texture, and allows some flavor development. Thirty minutes is the minimum; 24 hours is the real target.
4. Pull underdone, rest on pan. Carry-over cooking from the hot baking sheet finishes the center after you pull the cookies from the oven. If the centers look done in the oven, they will be overdone on the plate. The 10-minute pan rest is part of the baking process, not just cooling.
Brown Butter: What’s Actually Happening in the Pan
Butter is approximately 80% fat, 16-17% water, and 2-3% milk solids — the proteins and lactose that give dairy its characteristic flavor. Browning proceeds in two stages:
Stage 1 — Water evaporates. The foam you see in the first 2-3 minutes is water boiling off as steam. The pan temperature is capped at 212°F (100°C) while water is present — no browning can occur until the water is gone.
Stage 2 — Maillard browning. Once the water is gone, the milk proteins react with the lactose in the Maillard reaction — the same chemistry behind seared meat, bread crust, and roasted coffee. This produces hundreds of flavor compounds, including nuttiness, toastiness, and mild caramel notes. The solids that settle on the pan bottom turn from pale to golden amber.
The visual cues: foam subsides, specks appear on the pan bottom, color shifts from yellow to golden amber, and the kitchen fills with a distinct hazelnut smell. Pull it the moment the solids are golden — not dark brown, not black. The butter keeps cooking in the hot pan for several seconds after you pour it out.
Use a light-colored pan. A dark nonstick pan masks the color change and makes it easy to go from perfect to burnt without seeing it.
Cold Dough: Three Reasons Chilling Works
The instruction to refrigerate cookie dough appears in almost every elevated cookie recipe, and home bakers routinely skip it or cut it short. These are the three actual reasons it matters:
Butter resolidification. After browning, the butter is liquid. When you mix it with sugars and eggs, the dough is soft and warm. In a hot oven, liquid fat melts immediately and the cookie spreads flat before the flour proteins can set the structure. A cold dough starts with butter in a semi-solid state, which melts more slowly and allows the cookie to hold its height before flattening.
Flour hydration. Flour takes time to fully absorb liquid — the water in eggs and butter doesn’t fully incorporate in the few minutes of mixing. A rested dough is better hydrated, which improves both texture (more cohesive, less crumbly) and bake behavior.
Flavor development. Over 12-48 hours of cold rest, enzymatic activity in the flour converts some starches to simple sugars, and sugar migration through the dough creates more even, complex sweetness. Kenji López-Alt at Serious Eats documented this effect with standard chocolate chip cookies: 12-24 hour rests produced more complex flavor and better browning. Brown butter already has more flavor to start with, but the rest amplifies it further.
The minimum is 30 minutes — the chilling time needed to firm up the butter. The practical optimal is overnight. At 24-48 hours, you get the full flavor benefit. Beyond 72 hours, the dough starts to break down and the cookies can come out flatter.
Chocolate: Chopped vs. Chips
Chocolate chips are specifically formulated to hold their shape in a hot oven. They contain added cocoa butter, stabilizers, or reduced-cocoa-content fat that prevents them from fully melting. This is useful in some applications (you want recognizable chips in a muffin or scone) but counterproductive in a gooey brown butter cookie.
Chopped chocolate from a quality bar (Guittard, Ghirardelli, Lindt 70%, or similar) melts more completely into pools and puddles rather than staying as intact rounds. This produces the dramatic chocolate pull that defines the visual in TikTok content, and it creates larger, more irregular melt areas than chips do.
The practical approach: use a mix. Chips for pockets of solid chocolate; chopped chocolate for melt. The ratio doesn’t need to be precise — half and half works well.
Press 3-4 pieces of chopped chocolate directly onto the tops of the dough balls before baking. They’ll melt into visible pools on the finished cookie surface. This is the detail that makes a home cookie look like it cost $7.
The Underdone Pull: Why You Yank Them Early
The target internal temperature for a properly gooey brown butter cookie at the point of pulling from the oven is approximately 175°F. At this temperature, the egg proteins haven’t fully set and the center is still somewhat fluid. The cookies look wrong — shiny, domed, clearly not done. That’s correct.
When you place the hot baking sheet on a cooling rack, the sheet continues radiating heat into the bottom of the cookies for 5-10 minutes. This carry-over heat finishes the center from below while the top cools from above. The result is a set but gooey center — fully cooked in the food-safe sense, but soft enough to pull apart in a satisfying way.
If you wait until the centers look done in the oven (internal temp around 195-200°F), the carry-over will push them to overdone and the gooey center will disappear into a uniformly dry cookie.
The visual cue: edges set and just beginning to color, centers still glossy and slightly domed. If you push on a center with a fingertip and it springs back quickly and cleanly, it’s overdone. You want it to push back very slowly, still warm and yielding.
The Flaky Salt Finish: Not Optional
Flaky sea salt (Maldon, Jacobsen, Fleur de Sel) does two things in this context that fine table salt cannot:
Flavor contrast. Salt suppresses bitterness and amplifies sweetness — salted baked goods consistently taste more flavorful than undersalted ones, all else equal. In a rich brown-butter cookie, the salt contrast makes the caramelized edges taste more caramelized, the chocolate taste more chocolatey, and the brown butter more complex.
Texture. Flaky salt applied to a hot cookie surface partially melts into the surface but retains enough crystal structure to be experienced as a distinct textural burst when you bite in. Fine salt dissolved into the dough doesn’t provide this — it’s background seasoning. The flaky salt finish is a finishing salt, not a structural one.
Apply it the moment the cookies come out of the oven, while the surface is still wet from the melted chocolate and warm dough. It adheres as the cookies cool.
Troubleshooting: Why Your Batch Didn’t Work
Brown butter dough is less forgiving than a standard creamed-butter dough because it starts out softer. Almost every failure traces back to temperature or measurement.
Cookies spread flat and thin. The dough was too warm, or there wasn’t enough flour. Brown butter loses roughly 15% of its volume to evaporated water, so a recipe that works with regular butter can come out fat-heavy — always weigh the flour (280g) instead of scooping, which packs in less. Then check the chill: skipped or shortened chilling is the number-one cause. If your kitchen runs warm, chill the scooped balls a second time for 10 minutes before they hit the oven, and never bake on a hot sheet — a warm pan melts the dough on contact and it’s flat before it sets.
Cookies came out cakey and dry, not chewy. Usually overmixed dough (too much gluten developed after the flour went in) or too much flour. Fold only until the dry streaks disappear, and measure by weight. A whole extra egg instead of just the yolk also pushes cookies toward cakey — the yolk-only addition is deliberate.
The chocolate stayed in intact chips, no pools. You used stabilized chocolate chips, which are formulated to hold their shape. For the melty puddle look, switch to chopped bar chocolate, or press a few extra chopped pieces onto the tops of the dough balls before baking.
The brown butter tastes bitter or acrid. It went past golden amber into burnt. The milk solids turn from perfect to scorched in under 30 seconds, and the butter keeps cooking in the hot pan after you pull it. Use a light-colored pan so you can see the color, and pour the butter into a cool bowl the instant it smells nutty — don’t wait for it to look darker.
Centers are raw and gummy even after cooling. They were genuinely underbaked, not just gooey — or the cookies were moved off the pan too early, before carry-over heat finished the centers. Give them the full 10-minute rest on the sheet. If they’re still gummy after that, add a minute of bake time next batch and confirm your oven runs to temperature (an oven thermometer settles this fast — many home ovens run 15-25°F cool).
Variations
Double brown butter: After making the recipe once, brown 2 additional tablespoons of butter separately and drizzle over the tops of the just-baked cookies along with the flaky salt. This adds another layer of brown-butter flavor on top of the cookie.
Espresso brown butter cookies: Add 1 tablespoon of finely ground espresso powder to the dry ingredients. Espresso amplifies chocolate flavor without adding distinct coffee taste (in small quantities). The brown butter and espresso combination produces a toffee-coffee note that pairs exceptionally well with dark chocolate.
Brown butter + sea salt + dark chocolate: Use chopped 70% dark chocolate exclusively, increase the flaky salt slightly, and reduce the granulated sugar to 1/3 cup. The bitter-sweet-salt combination is more complex than the standard version — more adult, less dessert-sweet.
Brown butter tahini cookies: Replace 3 tablespoons of butter with 3 tablespoons of well-stirred tahini. Reduce vanilla to 1 teaspoon and add 1/2 teaspoon of ground cardamom. Use chopped dark chocolate. The sesame-brown-butter combination produces a Middle Eastern pastry profile with significant complexity.
Browned butter snickerdoodle: Use this dough minus the chocolate. Roll each ball in cinnamon sugar before baking. Add 1/2 teaspoon of cream of tartar to the dry ingredients (the snickerdoodle tang). Bake at 350°F to prevent over-spreading. The brown butter makes snickerdoodles dramatically richer than standard versions.
Browned butter shortbread: Use the brown butter from this recipe (1 cup butter → approximately 3/4 cup browned butter by volume after water evaporates), mix with 1/2 cup powdered sugar, 2 cups all-purpose flour, and 1/4 teaspoon salt. No eggs, no leavening. Press into a pan, chill 30 minutes, slice into rectangles, bake at 325°F for 20-25 minutes. Brown butter shortbread is considerably more complex than standard versions.
Making Large Batches and Freezing
This recipe scales cleanly. Double or triple the recipe by weight — the ratios hold at scale.
Freezing unbaked dough: Scoop the dough into balls after chilling, place on a parchment-lined sheet, and freeze solid (about 2 hours). Transfer the frozen balls to a zip bag. Freeze for up to 3 months. Bake from frozen at 375°F for 13-15 minutes — no need to thaw. The chilling step is essentially built into the freeze.
Freezing baked cookies: Let cool completely, freeze in a single layer, then bag. Reheat from frozen in a 325°F oven for 4-5 minutes or in the microwave for 20-25 seconds. Microwaving restores the gooey center; oven reheating restores the crispy edges.
Cost
A full batch of 16 large cookies costs approximately $7-10 in ingredients: butter ($1.50), chocolate ($3-4 for a quality bar, $2-3 for chips), sugars and flour ($1-2 total), eggs and vanilla (under $1). That’s $0.45-0.65 per cookie versus $4-7 per cookie at a specialty bakery.
Where This Fits in the Brown Butter Recipe Family
The brown butter technique applied here is the same mechanism as the elevated crispy rice treats — Maillard browning of milk solids — but in cookies the brown butter is cold before use and it’s combined with sugar first rather than marshmallows. For the science behind why browning works in both recipes, see the crispy rice treats guide.
For more chocolate chip cookie variations, the copycat Levain chocolate chip walnut cookie uses a completely different approach — less butter, more flour, more chocolate, more walnut, and a very short bake time — that produces a dense, high-domed NYC-bakery-style cookie. Copycat Subway cookies show the opposite end of the spectrum: a softer, more uniform commercial-style cookie. Copycat Crumbl chocolate chip cookie goes in the direction of maximum size and pink-frosting contrast.
For another baking project that uses brown butter, copycat Olive Garden breadsticks finish with a garlic-brown-butter glaze rather than the standard garlic oil.