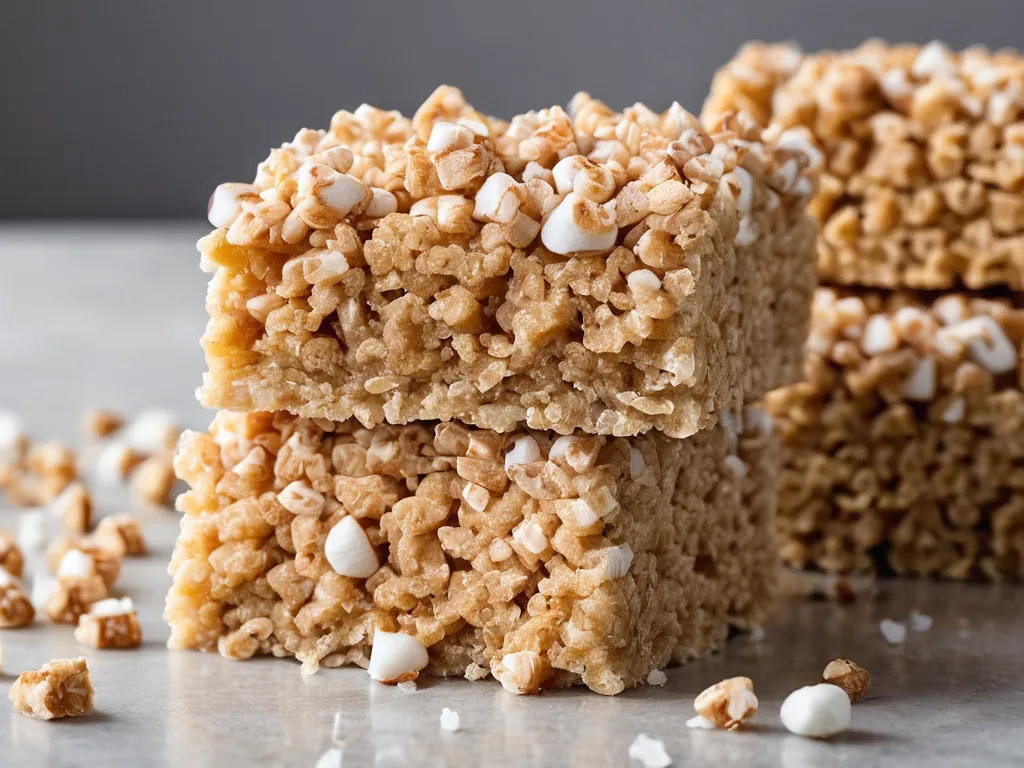
Elevated Crispy Rice Treats
The original recipe hasn’t changed since 1939: butter, marshmallows, crispy rice cereal. It works. But TikTok figured out that two extra minutes of technique — browning the butter, browning the marshmallows — produces something that tastes like a $6 bakery treat instead of a box-mix snack.
The difference isn’t subtle. You’ll taste it in the first bite.
TL;DR
Brown the butter until the milk solids turn golden amber and smell nutty (5 minutes). Add marshmallows and let the bottoms caramelize before stirring (60–90 seconds). Remove from heat, fold in cereal and a cup of mini marshmallows, press gently into the pan, and finish with flaky sea salt. The browning takes under 10 extra minutes. What it gives you is a toasted, caramel-depth flavor the original recipe cannot produce.
The Original: 1939, Battle Creek, Michigan
Rice Krispies Treats were created at Kellogg Company’s headquarters in Battle Creek, Michigan in 1939. Kellogg credits Mildred Day and Malitta Jensen — two Kellogg employees — with developing the recipe to raise money for a Camp Fire Girls fundraiser. A Kansas City chapter asked Kellogg for help; Day was sent to Kansas City and reportedly worked 16-hour days for two weeks making batches for the girls to sell door-to-door. The recipe was originally called “Marshmallow Squares” and appeared on Rice Krispies boxes starting in 1941.
The original formula is a monument of simplicity: melt butter, melt marshmallows into the butter, stir in puffed rice cereal, press into a pan, cut into squares. No oven required. No eggs, no flour, no baking. It was designed to be made by children and volunteers with no culinary training, and that simplicity is both its charm and its ceiling.
The TikTok era didn’t invent a new recipe. It applied one simple principle from professional pastry technique — controlled browning — to a recipe that millions of people already loved.
What TikTok Did to Them
The elevated crispy rice treat trend spread across TikTok in 2021 and 2022, but the technique itself is older: Smitten Kitchen published a “Salted Brown Butter Crispy Treats” recipe as early as November 2009. TikTok amplified a technique that pastry chefs and food writers already knew. No single creator invented it on social media — the wave was driven by dozens of food creators independently, and the browned marshmallow addition was pushed by multiple creators in the TikTok era. The visual power of the before-and-after format did the rest: white, flat original vs. golden, tall, bakery-quality upgrade.
The side-by-side content format was perfectly suited to the technique. Viewers could see the color difference, the texture difference, the pull-apart gooeyness in real time. The trend brought in home bakers who had not made crispy rice treats in years, and elevated-version recipes now dominate the top search results for the original dish.
Brown Butter: The Science
Butter is approximately 80% fat, 16–17% water, and roughly 2% milk solids — the proteins and natural sugars (primarily lactose) that give dairy butter its flavor. When you melt butter and keep cooking, three things happen in order:
Phase 1 — Water evaporates. The sputtering and foaming you see in the first 2–3 minutes is water boiling off as steam. The butter cannot brown until this water is gone because the water caps the pan temperature at 212°F (100°C), and browning requires temperatures above that.
Phase 2 — Maillard reaction. Once the water is gone, the milk proteins react with the milk sugars in the pan. This is the Maillard reaction — the same chemical process behind the crust on seared meat, the color of fresh bread, the surface of a chocolate chip cookie. The milk solid proteins interact with lactose under heat to produce hundreds of flavor compounds, including nuttiness, toastiness, and a hint of butterscotch. The visual signal is the foam subsiding and small golden-brown specks appearing on the pan bottom.
Why it stops: Pull the pan off heat when the solids are golden amber and smell like hazelnuts. The residual heat in the pan will deepen them by another shade. Dark brown = bitter. Golden = perfect.
The practical difference in flavor between plain melted butter and browned butter is not subtle. In a recipe this simple, with so few ingredients, the flavor of each one carries significantly more weight. The browning doesn’t require more butter — it requires more attention.
Browning the Marshmallows: The Second Step
Most elevated crispy rice treat recipes brown the butter but stop there. The extra step that matters: let the marshmallows sit in the pot without stirring before you mix them.
Marshmallows are primarily sugar (corn syrup and sucrose) with gelatin providing their structure. When they hit the bottom of a hot pan, two things happen:
Caramelization of the sucrose and corn syrup — sugar molecules break down and recombine into hundreds of compounds with flavors ranging from toasted to bitter-sweet to butterscotch. Caramelization of sucrose begins around 320°F.
Maillard reactions involving the gelatin protein and available sugars — producing the same complex browning as the butter, but this time with the flavor notes of the marshmallow.
The combined effect is that a fully browned melted marshmallow mixture is golden rather than white and tastes noticeably more complex — toasted sugar rather than plain sweet. It doesn’t taste like caramel in a one-note way; it tastes like a more interesting version of itself.
The visual cue: the mixture goes from white to ivory to a pale golden color as you stir. If your finished marshmallow mixture is still bright white, you haven’t browned it enough.
The Extra-Marshmallow Trick
The standard ratio — 10 oz marshmallows to 6 cups cereal — is fine. The elevated version uses more marshmallow by mass, and the key technique is folding in mini marshmallows off heat.
When you remove the pot from the burner and immediately scatter in a cup of mini marshmallows, they melt only partially — the mixture isn’t hot enough to fully liquefy them, so they remain as distinct gooey pockets distributed through the finished treat. Cut into a square and you’ll see white marshmallow pools alongside the golden base.
It takes under five seconds to add. The texture difference is significant.
The Anti-Press Rule
This is the single most common mistake in crispy rice treats, elevated or not. The recipe instructs you to press the mixture into the pan, and home cooks interpret that as “press firmly.” It means the opposite.
Crispy rice cereal is a puffed grain — each piece is mostly air trapped inside a thin cell of puffed rice starch. When you press the mixture hard into the pan, you’re collapsing those air cells. The treats compact, the cereal-to-marshmallow ratio shifts (more cereal per bite, less marshmallow), and the finished product is dense and chewy in the wrong direction.
Correct technique: Butter your fingertips or lay a sheet of plastic wrap over the surface and barely touch it — just enough to level the top. If you can feel real downward resistance, you’re pressing too hard. The goal is height, not density.
Variations
Fruity Pebbles version: Substitute Fruity Pebbles cereal for the Rice Krispies, keep the brown butter, and use mini marshmallows only (skip the browning step — the vivid colors wash out). Finish with rainbow sprinkles. The result is sweet, fruity, and visually striking. Good for kids’ parties.
Peanut butter version: Stir 3 tablespoons of creamy peanut butter into the browned marshmallow mixture before adding the cereal. Chocolate chips folded in off heat along with the mini marshmallows add a Reese’s-adjacent effect. Finish with flaky salt.
Cookie butter (Biscoff) version: Stir 3 tablespoons of Biscoff or other speculoos spread into the marshmallow mixture. The spiced-cookie flavor pairs well with the brown butter caramel notes. See the cookie butter guide for Biscoff flavor composition.
Tahini and dark chocolate: Stir 2 tablespoons of well-stirred tahini into the marshmallow mixture, then fold in ½ cup of dark chocolate chips off heat. Finish generously with flaky salt. The sesame-chocolate-brown-butter combination skews adult and sophisticated.
S’mores version: Substitute 2 cups of the cereal for 2 cups of coarsely crushed graham crackers, add 1 cup of mini marshmallows on top before setting, and press mini chocolate chips into the surface while warm.
Salted caramel drizzle: Make the standard elevated version, let cool for 15 minutes, then drizzle with 2 tablespoons of store-bought caramel sauce and additional flaky sea salt. Chill for 10 minutes to set the drizzle before cutting.
Rice Krispies Brand vs. Generic
Kellogg’s Rice Krispies and generic crispy rice cereals are made by the same basic puffed rice process, but the air cell structure and wall thickness can vary between manufacturers. Brand-name Rice Krispies tend to have more consistent, evenly sized puffed grains. Generic crispy rice cereal is usually slightly denser or less uniform.
In practice, the difference is minor and most home bakers won’t find it significant — especially with the elevated technique, which provides enough flavor depth to compensate for any textural variation. Use whichever you have. The technique matters far more than the brand.
Storage and How to Revive
Day 1: Best texture. Gooey, light, properly salted.
Days 2–3: Airtight container at room temperature. The flaky salt partially dissolves into the surface; the marshmallow structure firms slightly. Still very good.
Day 3+: Quality drops noticeably. The cereal softens further and the treats lose their snap.
Do not refrigerate. Cold causes the marshmallow to contract and the treats to become hard and unpleasant.
Revival method: Microwave individual squares for 8–10 seconds. The marshmallow softens, the treats become gooey again, and most of the fresh texture returns. This also works on day-old treats that have firmed up from sitting.
Troubleshooting
Too hard and dense: You pressed too firmly. Next time, use lighter pressure with buttered fingertips. Also check that you didn’t overheat the marshmallows — the longer and hotter the marshmallow cooks, the more the sugars cross-link into a rigid candy structure.
Falling apart when you cut them: Two possibilities: not enough marshmallow (use the full 10–12 oz plus extra mini marshmallows), or cut before they were fully set (needs 30–45 minutes at room temperature). Cutting too early is more common.
Bland, not complex: The butter wasn’t browned long enough (no golden-brown milk solid specks visible in the pan) or the marshmallows weren’t browned (mixture was still white when you folded in the cereal). Or the flaky salt was left off — the salt is not optional in this version; it’s what separates “pretty good” from “extraordinary.”
Marshmallows got scorched/bitter: Heat was too high or the marshmallows were stirred too soon. Use medium heat throughout and let them sit for 60–90 seconds before stirring. If they smell acrid or look dark brown (not golden), discard and start over.
Cost Comparison
| Source | Cost per treat |
|---|---|
| Home (this recipe) | ~$0.55 |
| Bakery or specialty shop | $4–7 per treat |
| Gas station / convenience store | $1.50–2.50 (original recipe, not elevated) |
The ingredients for a full batch (12 squares) cost roughly $6–7 total: butter ($1.20), a bag of marshmallows ($2.50), a box of cereal (~$3.50), vanilla and salt (negligible). That’s under $0.60 per square for what a bakery sells for $5 or more.
Brown Butter Elsewhere
If you enjoyed the brown butter technique here, it’s the same principle as the viral TikTok brown butter cookie — the same Maillard browning of milk solids, applied to a different carrier. Hot chocolate bombs use a similar folding-in-off-heat approach for inclusions. The caramelized banana uses the caramelization side of the same sugar chemistry applied here to marshmallows. Chocolate mug cake is another fast-prep dessert in the same no-fuss category.