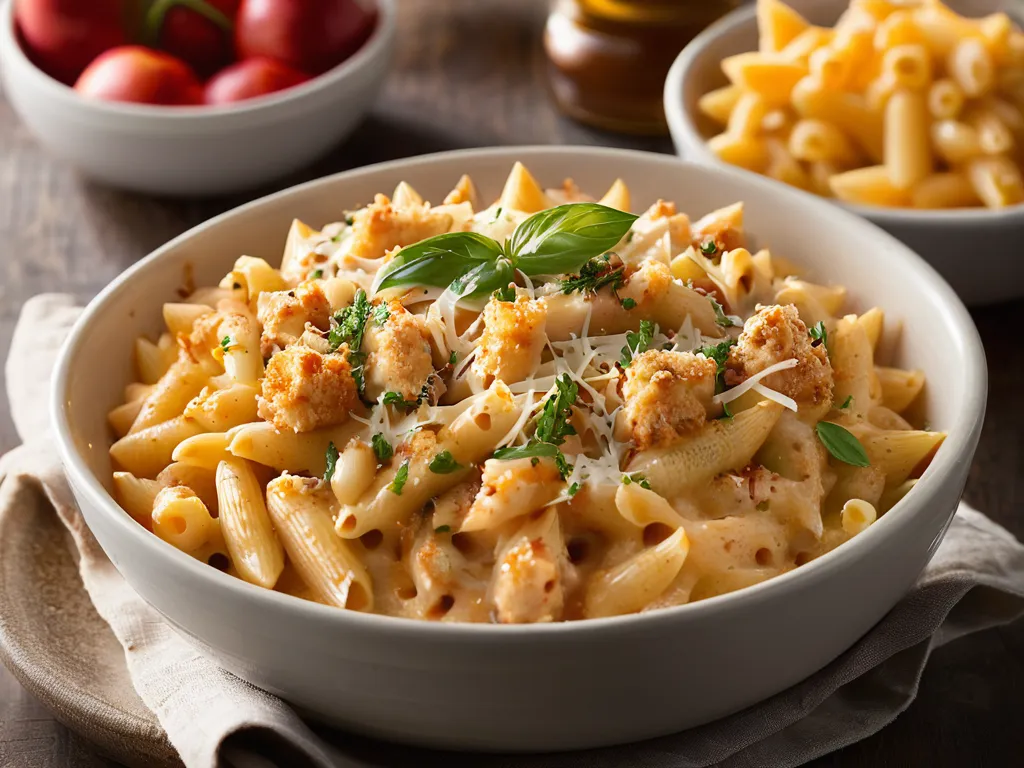
Applebee’s Four Cheese Mac and Cheese with Honey Pepper Chicken
Prep time: 25 minutes Cook time: 35 minutes Servings: 4 servings
Applebee’s Four Cheese Mac and Cheese with Honey Pepper Chicken Tenders is one of the most-copied casual dining dishes for a reason: it works on paper in a way few comfort-food combinations do. Creamy four-cheese sauce, sweet-and-spicy glazed chicken, smoky Applewood bacon, and ridged penne tubes that hold sauce inside and out. (Applebee’s official menu lists it as “four-cheese penne mac & cheese” — so it’s penne, not elbow macaroni.)
There’s one widely repeated misconception worth clearing up immediately: Gorgonzola (a blue cheese with a funky, pungent character) does not appear in this dish. Applebee’s doesn’t publish its exact cheeses, but every credible copycat agrees on no Gorgonzola. Beyond that, Asiago and Parmesan are the two cheeses that appear consistently across independent recipe developers. The other two slots vary: this recipe uses Romano and Mozzarella (producing a savory, Italian-leaning profile), while other well-tested versions use sharp cheddar and Monterey Jack (a more American-style blend that’s slightly sharper and less nutty). Either pairing works — the dish’s flavor is primarily driven by the Asiago/Parmesan base. If you’ve made a copycat version with Gorgonzola and thought it tasted wrong, it was wrong.
TL;DR: Four cheeses (Romano, Asiago, Parmesan, Mozzarella) + penne + Applewood bacon + pineapple-honey pepper glazed chicken tenders. The sauce needs to come off the heat before you add cheese. The honey pepper sauce needs 15+ minutes to reduce into a glaze.
The Four Cheeses: Why Italian Blends Work for This Dish
Most American mac and cheese recipes lean on cheddar for their backbone. This recipe uses an Italian-leaning blend (Romano, Asiago, Parmesan, Mozzarella) based on the flavor profile of the restaurant version — the result is savory and nutty rather than sharp or tangy. If you prefer a more American-style approach, substitute sharp cheddar for Romano and Monterey Jack for Mozzarella; this produces a slightly sharper, more familiar mac-and-cheese character that still works well with the honey pepper chicken.
Here’s what each cheese contributes:
Romano — The saltiest and most assertive of the four. Aged sheep’s milk Romano (Pecorino Romano) has a grainy texture and a peppery, briny punch that you’d recognize in cacio e pepe. In a mac sauce, it adds the savory backbone that keeps this from tasting bland.
Asiago — A semi-firm Italian cow’s milk cheese with a buttery, nutty character. Fresh Asiago is mild and melts easily; aged Asiago (fresco vs. stagionato) is sharper. For this recipe, use fresh or medium-aged Asiago — it melts cleanly into the sauce and adds sweetness without competing with Romano.
Parmesan — The umami anchor. Parmesan’s glutamate content is among the highest of any cheese, which is why a sprinkle on pasta makes everything taste more intensely “meaty” and savory. In the sauce, it adds depth rather than a pronounced cheese flavor. Use freshly grated, not the green canister — pre-grated Parmesan contains cellulose that prevents smooth melting.
Mozzarella — The creaminess and stretch. Low-moisture shredded Mozzarella has the highest water activity of the four cheeses and melts at the lowest temperature, which is why it goes in last, off the heat. It creates the smooth, glossy texture and the slight pull when you scoop the pasta.
Add them in this order: Romano and Asiago first (they need more heat to melt), Parmesan second, Mozzarella last — after the pan is off the burner. This sequence prevents the high-protein Mozzarella from seizing into rubbery strings.
The Cheese Sauce: Roux First, Cheese Off Heat
The sauce follows a classic French béchamel path: butter and flour cooked into a roux, then milk and cream whisked in until thickened.
The most common mistake is adding cheese while the sauce is still on the burner. At active simmer temperature (~200°F), the proteins in cheese denature and clump rather than melt smoothly — you get grainy sauce instead of velvety sauce. Residual heat from a thick saucepan is enough to melt all four cheeses. Take the pan completely off the burner before adding any cheese.
Whole milk + heavy cream vs. all milk: The 3:1 milk-to-cream ratio gives the sauce body without making it too rich to eat a full serving. All-cream sauce is too heavy; all-milk sauce is too thin and prone to breaking. If you don’t have heavy cream, use an extra ¼ cup whole milk and reduce slightly longer.
Dry mustard powder: A ¼ teaspoon does two things — adds a faint warmth you’d miss if it weren’t there, and acts as an emulsifier that helps the cheese sauce stay smooth. Standard in every mac and cheese sauce worth making.
The Pasta: Penne, Not Elbow Macaroni
The menu calls this “mac & cheese,” which sets up an expectation of elbow macaroni. It isn’t. Applebee’s official menu describes the dish as “four-cheese penne mac & cheese,” and the pasta shape genuinely matters here.
Penne rigate (the ridged version) gives you two things plain elbows don’t:
- Ridges on the outside that grip sauce and keep it from sliding off
- A wide, hollow tube that fills with cheese sauce so you get a pool of it in every bite
Elbow macaroni is smooth, small, and compact — sauce coats the outside but the tube is too narrow to hold much. Penne’s larger bore and ridged surface are why the dish reads as cheesier per bite even at the same sauce-to-pasta ratio. Buy penne rigate (ridged), not penne lisce (smooth), if you have the choice.
Cavatappi — the ridged corkscrew many copycat recipes reach for — is an honest upgrade if you want maximum sauce cling: same ridges plus a curl that traps even more sauce. Cellentani (a tighter corkscrew) does the same. Either substitutes cleanly for penne; just know the restaurant plates penne.
The Honey Pepper Sauce: Pineapple Juice Is the Secret
The honey pepper sauce is where home cooks most often go wrong. They make it too thick (like a candy), skip the acid (it needs balance), or miss the tropical note that Applebee’s version has.
The ingredient that most copycat recipes understate: pineapple juice. A quarter cup of pineapple juice adds tropical sweetness and a mild acidity that helps the sauce reduce to a glaze consistency without caramelizing into candy. It also has bromelain enzymes that tenderize anything it touches — relevant if you’re marinating the chicken briefly.
Simmer time matters. The sauce starts as a thin liquid and needs 15–20 minutes at a low simmer to reduce. Don’t rush it on high heat — the honey and brown sugar will burn before they reduce. You want steady bubbling at medium-low. The cornstarch slurry at the end gives you a little extra cling without boiling long enough for the honey to caramelize.
Black pepper vs. cayenne: Black pepper provides the slow, building heat. Cayenne is sharper and more immediate. Use both — they give you two different heat waves rather than one. The Applebee’s version is noticeably sweet-first, heat-second. If you want it hotter, add cayenne rather than more black pepper.
The sauce is best used warm — it thins slightly when hot (easier to toss), then tightens into a glaze as it cools on the chicken. Toss the chicken immediately after pulling from the fryer while both are hot.
The Chicken Tenders: Crispy Is Non-Negotiable
The textural contrast in this dish — crunchy glazed chicken against creamy pasta — is what makes it interesting rather than one-note. If the chicken is even slightly soft, the whole dish collapses into mush.
Buttermilk soak: Even 15 minutes in buttermilk makes a difference. The lactic acid starts to tenderize the outer layer, and the buttermilk proteins stick to the flour coating better than an egg wash alone, giving you a thicker, crunchier crust.
Fat temperature: 350°F for pan-frying. Too hot (375°F+) and the exterior burns before the center cooks through. Too low (325°F) and the coating absorbs oil rather than crisping. Use a candy/fry thermometer.
The shortcut that actually works: Frozen breaded chicken tenders from Tyson or a store brand, baked at 425°F or air-fried at 400°F for 14–15 minutes, flipped once. The honey pepper sauce is strong enough to carry the dish — you won’t miss homemade tenders if the sauce is properly made. This shortcut reduces active prep to under 10 minutes.
The Applewood Bacon: Don’t Skip It
Applewood-smoked bacon is part of the dish, not optional garnish. Smoky, slightly sweet Applewood bacon cuts through the richness of the four-cheese sauce in a way that regular smoked or maple bacon doesn’t. The fruit-wood smoke complements the pineapple note in the honey pepper sauce.
Cook the bacon until genuinely crispy — it needs to stay crunchy under the warm cheese sauce. Floppy bacon disappears into the dish texturally. Crumble it into irregular pieces rather than uniform bits so you get occasional big crunchy hits.
Variations Worth Making
Extra-crispy tenders: After the first buttermilk dip and flour dredge, dip back into buttermilk and dredge through flour again. Double-dredging creates a thick, shaggy crust that stays crunchy longer after glazing.
Lighter sauce version: Replace half the heavy cream with additional whole milk and reduce one full minute longer to compensate. Reduce Mozzarella by ¼ cup — the sauce is thinner but still coats the pasta properly.
Spicier glaze: Add 1 teaspoon of sriracha or ½ teaspoon of chipotle powder to the honey pepper sauce. This shifts the heat profile from black pepper’s slow burn to a smoky, front-loaded heat that works well against the mild Italian cheese blend.
Vegetarian version: Skip the chicken tenders and increase the bacon (or omit and use smoked paprika in the cheese sauce for smokiness). Add a thin layer of panko breadcrumbs toasted in butter, broiled on top for 2–3 minutes — this replaces the textural contrast the chicken provides.
Make Ahead and Storage
The cheese sauce: Make up to 2 days ahead and refrigerate. Reheat on the stovetop over low heat, adding a splash of milk (2–3 tablespoons) to loosen it as it warms. Don’t microwave the sauce alone — it breaks.
The honey pepper sauce: Keeps refrigerated for up to 2 weeks. Reheat in a small saucepan over low heat; it will re-liquefy immediately.
Assembled dish: Best eaten fresh. The pasta absorbs the sauce over time and the chicken loses its crispiness. If you’re feeding a crowd, keep components separate and assemble to order.
Reheating leftovers: Reheat the mac in a saucepan or microwave with a splash of milk to restore creaminess. Re-crisp the chicken in an air fryer at 375°F for 3–4 minutes, then re-glaze. Don’t reheat the assembled dish — the chicken goes soggy.
Restaurant vs. Homemade Cost
| Applebee’s | Homemade | |
|---|---|---|
| Price | ~$16–18 per order | ~$12–14 for 4 servings ($3–3.50/serving) |
| Calories (full dish) | ~1,360–1,460 | ~1,100 (slightly less sauce) |
| Cheese quality | Pre-shredded industrial blend | Freshly grated — noticeably better flavor |
| Sauce control | Fixed portion | Adjustable — more cheese, less, spicier glaze |
| Time | 0 (order and wait) | ~60 minutes including honey pepper reduction |
The homemade version costs less per serving and gives you control over the cheese quality (freshly grated vs. pre-shredded is a meaningful flavor difference). The honey pepper sauce can be doubled and refrigerated for two weeks — next time it’s a 30-minute dish.
If you’re working through the Applebee’s menu, the Honey Pepper Chicken page covers the standalone chicken with additional sauce variations. The Fiesta Lime Chicken is another high-traffic dish from the same kitchen. For more mac and cheese comparisons, see Panera’s Mac and Cheese — a very different approach (creamy Gruyère-based) and Chick-fil-A’s Mac and Cheese — closer to the classic yellow cheddar style. The Spinach Artichoke Dip is a perennial crowd-pleaser from the same Applebee’s menu if you’re building out a home version of the full experience.