Pin It

Crispy Gnocchi (The Viral No-Boil TikTok Technique)

Crispy Gnocchi (The Viral No-Boil TikTok Technique)
Jump to Recipe
Prep 5 min Cook 12 min Serves 2–3
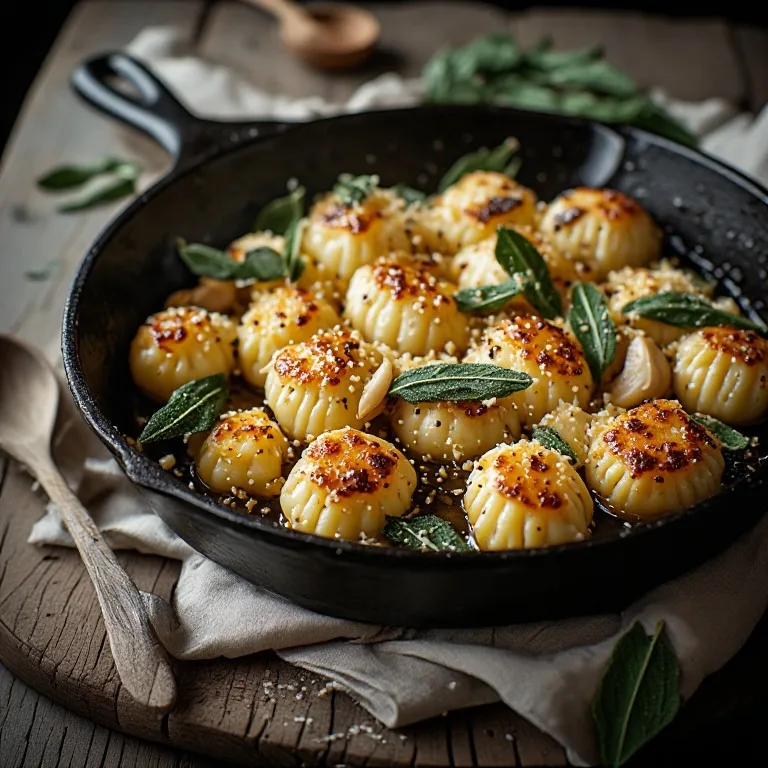
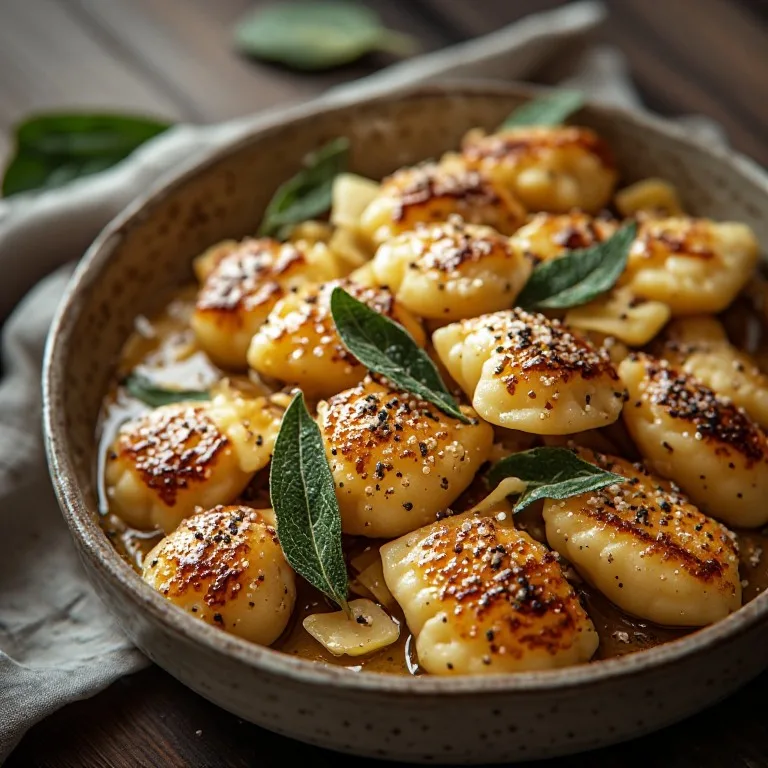
Quick answer: Crispy gnocchi skips the boiling step entirely — shelf-stable gnocchi goes straight from the bag into a hot skillet with 3 tablespoons of olive oil over medium-high heat. Press slightly to maximize contact, then don't touch for 4 full minutes until the bottom is deeply golden. Flip once and cook 3 more minutes on the second side. Both sides should be crispy before any sauce goes in. Three things most TikTok versions get wrong: (1) using fresh refrigerated gnocchi instead of shelf-stable dry-packaged — fresh gnocchi has too much moisture and steams in the pan instead of crisping; (2) moving the gnocchi too early — they need to release on their own after forming a proper crust, just like searing meat; (3) adding sauce or butter while the gnocchi is still wet and pale — any liquid kills the crust immediately. For the sage brown butter version: after both sides are crisp, push the gnocchi to the side, drop in 4 tablespoons butter and 10 sage leaves, swirl until the butter is nutty brown, then toss everything together with sliced garlic and Parmesan.

Shop the tools

Gear matched to this recipe. These are Amazon affiliate links — we may earn a small commission if you buy, at no extra cost to you.

As an Amazon Associate, Copycat Spices earns from qualifying purchases. Product images are generic illustrations, not the exact item listed.

Crispy Gnocchi (The Viral No-Boil TikTok Technique)

Skip the boiling water — TikTok's crispiest gnocchi goes straight from the bag into a hot pan and comes out golden outside, pillowy inside in under 15 minutes. The 3 mistakes to avoid, plus 5 sauces (sage brown butter, cherry tomato, pesto, Gorgonzola, miso butter).

Easy Prep: 5 min Cook: 12 min Total: 17 min2–3 servings ~$4.50/serving
Prep5 min
Cook12 min
Total17 min
Servings
2
At home~$4.50/serving
vs
Restaurant~$20.25/serving
You save ~78%

The Story Behind the Recipe

Skip the boiling water — TikTok's crispiest gnocchi goes straight from the bag into a hot pan and comes out golden outside, pillowy inside in under 15 minutes. The 3 mistakes to avoid, plus 5 sauces (sage brown butter, cherry tomato, pesto, Gorgonzola, miso butter).

Nutrition Facts

Per serving (2–3 servings)
Calories390
Total Fat17g
Total Carbs52g
Dietary Fiber3g
Sugars1g
Protein9g
Sodium480mg

* Estimated values based on standard recipe preparation. Actual values may vary.

Ingredients

  • Gnocchi
  • For searing
  • For the sage brown butter finish
  • Finishing

Instructions

💡
Pro tip: This recipe tastes even better the next day. The flavors need time to meld together in the fridge.
❄️
Storage: Keeps in an airtight container in the fridge for up to 2 weeks. Freezer-friendly for up to 3 months.
🎃 Free Halloween cookbook — download now The Copycat Halloween Cookbook A ready-made, photo-illustrated PDF of our best halloween copycat recipes — free to download, no building required. Pay what you want to support if you love it.

Free PDF — instant download. We'll also send new seasonal copycat recipes now and then; unsubscribe anytime. Or just download it →

Crispy gnocchi became one of TikTok’s most-shared cooking revelations for a specific reason: it breaks a rule you assumed was absolute. Gnocchi, the Italian logic goes, gets boiled in salted water until the pillowy little dumplings float. Then you serve them. That’s it.

But TikTok discovered that if you skip the boiling step entirely and put shelf-stable gnocchi straight into a hot oiled pan, something completely different happens. The surface dries instantly on contact with the hot fat, the starch polymerizes into a golden shell, and 4 minutes later you have something that looks and sounds almost nothing like traditional gnocchi — a crispy, audible exterior with a creamy, soft interior. The contrast is the entire point, and it only works if you understand why each step exists.

Three Things Most TikTok Versions Get Wrong

1. Using fresh refrigerated gnocchi without prep. The refrigerated fresh gnocchi sold in the pasta aisle — soft, slightly tacky, with a short shelf life — has significantly higher surface moisture than shelf-stable packaged gnocchi. When you put wet-surface gnocchi into a hot pan, that moisture immediately flashes to steam. Steam is the enemy of crisping: it creates a humid microclimate between the gnocchi and the pan surface that prevents the surface temperature from rising high enough for the Maillard reaction. Instead of a crust forming, the gnocchi steams in place, softening further and sticking badly when you try to flip. Shelf-stable dry-packaged gnocchi (vacuum-sealed at room temperature in the pasta aisle) has controlled surface moisture — enough to stay soft inside when heated, but dry enough externally to sear properly. If you only have fresh refrigerated gnocchi, spread it on a parchment-lined sheet pan without overlap and freeze for 20–25 minutes before cooking. The par-freeze firms the exterior without cooking the interior, dramatically improving crisping performance. From-frozen-store gnocchi should be thawed in the refrigerator overnight, then par-frozen the same way.

2. Moving the gnocchi before the crust forms. The impulse to shake the pan, poke a piece, or stir after a minute or two is almost irresistible — the gnocchi look stuck, the sound is concerning, and instinct says to check. Don’t. The mechanism here is identical to searing a steak: as the surface heats and the Maillard reaction begins, the starch-rich gnocchi bonds temporarily with the pan surface. This looks like sticking but is actually the crust in progress. If you force the gnocchi off the pan before the crust fully sets, you tear it — leaving half the golden shell stuck to the pan, exposing wet dough that then steams instead of searing, and giving you gnocchi with mottled, thin, partially-developed crust instead of a consistent golden shell. The crust fully forms and releases on its own at the 4-minute mark. Slide a thin spatula under one piece as a test at 4 minutes — if it releases without resistance, flip everything. If it resists slightly, give it another 60 seconds. Trust the timer.

3. Adding sauce or butter while the gnocchi is still pale. A lot of TikTok videos add butter at the start or partway through crisping, reasoning that butter equals flavor. What butter actually equals at this stage is water: butter is about 17% water, and in a pan hot enough to sear gnocchi (around 375–400°F), that water flashes to steam immediately, creating exactly the humid environment that prevents crisping. You also burn the butter’s milk solids long before the gnocchi finishes. Any wet ingredient — butter, cream, pasta water, tomato, pesto — kills the crust the moment it hits a pan full of crisping gnocchi. The correct sequence: olive oil for searing (high smoke point, no water to speak of), both sides fully golden, then butter for flavor. By the time the gnocchi is ready, you reduce the heat slightly, add the butter and aromatics, and use the lower-temperature finishing window to build the brown butter without burning anything.

The Pan Matters

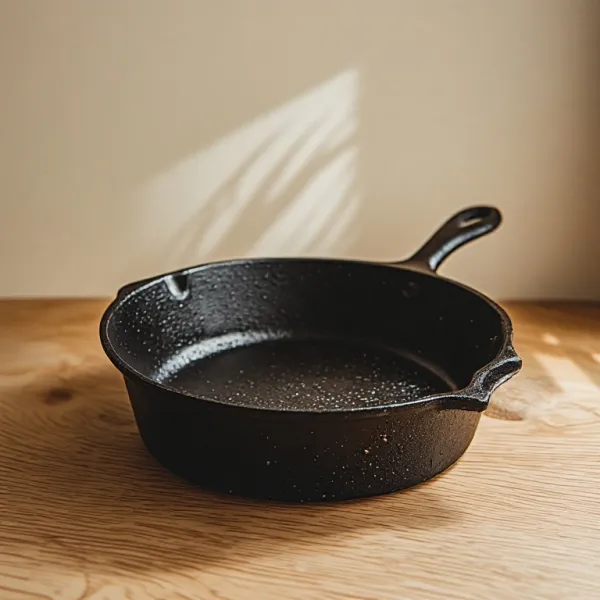
A 12-inch cast iron or stainless steel skillet is not optional. Nonstick pans can’t sustain the temperature needed to produce real Maillard browning without damaging the coating — the PTFE surface in nonstick pans begins degrading around 500°F, and most manufacturers recommend against exceeding 400°F. That’s right at the edge of the temperature needed for a proper sear. Cast iron holds heat most evenly across the whole surface and delivers the most consistent crust without hot spots. Stainless steel works well and shows you the browning clearly. A pan that’s too small will crowd the gnocchi, causing them to steam from each other’s moisture — use two pans or work in batches rather than piling them in.

The Sage Brown Butter

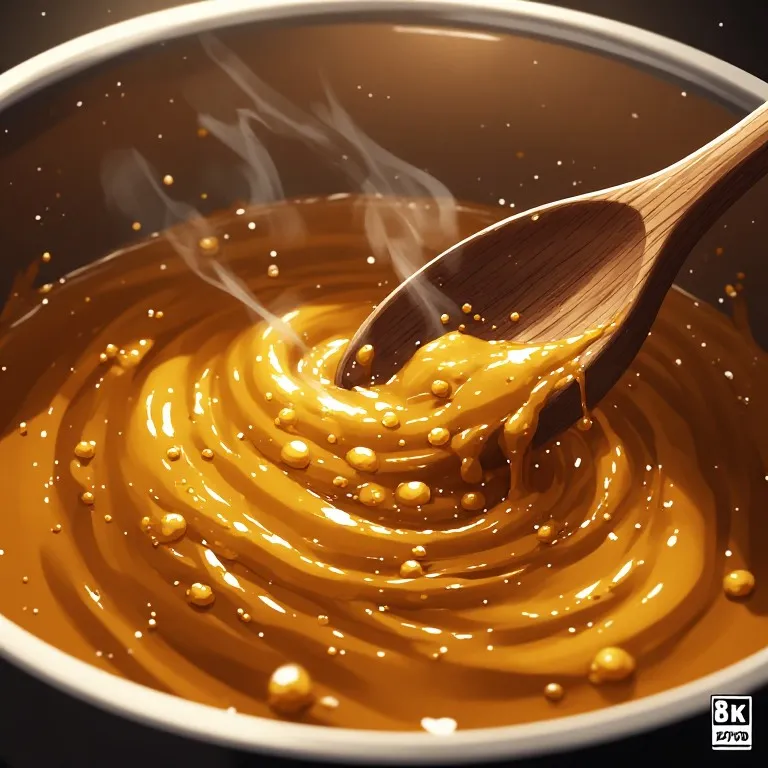
Beurre noisette — literally “hazelnut butter” in French, named for its color and smell — is one of the most transformative things you can do to a pound of butter in 90 seconds. As the butter melts and the water evaporates, the milk solids toast in the hot fat. At pale gold, it smells vaguely nutty. At deep amber, it smells like toasted hazelnuts, caramel, and something faintly cookie-like. At this stage the Maillard reaction is happening in the butter itself — the same reaction crisping the gnocchi — producing hundreds of new flavor compounds from the milk proteins and sugars.

Fresh sage leaves dropped into brown butter become crispy within 30 seconds and develop a concentrated, slightly earthy flavor that pairs instinctively with potato. The thinly sliced garlic softens and picks up some of the color. The whole combination — nutty butter, crispy sage, garlic — is one of Italy’s oldest pasta sauces precisely because it requires almost no skill to execute and the result is much more complex than the ingredient list suggests.

If sage brown butter is the version you want, we have a dedicated step-by-step brown butter gnocchi recipe that walks through the butter-browning stages in detail. This page is the broader technique — the crispy gnocchi base and the five different ways to sauce it below.

Timing Is Everything

Crispy gnocchi is not a dish that waits well. Once the crust forms it begins absorbing the butter and softening within 2–3 minutes of plating. Serve immediately — have the plates warm, have the Parmesan grated and ready, and go straight from pan to table. This is a 15-minute dish that happens to look and taste like it took considerably more effort. Keep the entire sequence moving once the gnocchi goes in.


Want to keep the crispy shell longer? Serve the brown butter separately in a small warm ramekin and let people pour it themselves. The gnocchi stays crisper without the butter soaking in on the plate.
🥗

Make It Healthier

Love Crispy Gnocchi (The Viral No-Boil TikTok Technique) but want a lighter version? Try these simple swaps:

  • ✓Reduce oil to 2 tablespoons and use a well-seasoned cast iron pan (which requires less oil than stainless for this technique) — you still get a good sear with slightly less fat
  • ✓Replace the brown butter with 2 tablespoons good olive oil infused with sage and garlic — a lighter finish that still carries the aromatics
  • ✓Add 2 cups baby spinach or arugula to the pan right after tossing with the brown butter — the greens wilt immediately in the residual heat and add color, fiber, and a bitter counterpoint to the richness

Frequently Asked Questions

Why do you skip boiling for crispy gnocchi?

Traditional gnocchi-making calls for boiling because the goal is a soft, steamed dumpling — boiling cooks the gnocchi through gently and produces a uniformly pillowy texture. But boiling adds a problem for pan-frying: it leaves the surface wet and slightly tacky, which means when you put the gnocchi in a hot pan, the surface water steams before the exterior can form a crust. You get gnocchi that softens further and sticks to the pan instead of developing a golden shell. Shelf-stable (dry-packaged) gnocchi — the kind sold in vacuum-sealed plastic pouches at room temperature, like DeLallo, Gia Russa, or most supermarket store brands — has already been dried and shelf-stabilized. Its moisture content is controlled: enough to stay soft inside when cooked in a hot pan, but low enough on the surface that it sears rather than steams. Drop this gnocchi directly into a pan with hot oil and the surface dries almost immediately on contact with the hot fat, then develops a golden crust via the Maillard reaction, the same chemical process that browns meat, bread, and potatoes. The interior stays soft because the fat conducts heat more gently than boiling water. You get the contrast — crispy outside, pillowy inside — that boiling alone can never produce.

What kind of gnocchi works best for this technique?

Shelf-stable dry-packaged gnocchi is the best choice by a wide margin. These are sold in vacuum-sealed pouches at room temperature in the pasta aisle — not refrigerated, not frozen. Common brands: DeLallo, Gia Russa, De Cecco, and most supermarket store brands. They have lower surface moisture than refrigerated or homemade gnocchi, which is why they crisp so reliably. Refrigerated fresh gnocchi (found in the refrigerated pasta section) can work, but requires extra prep: spread them on a sheet pan lined with parchment, don't let them touch, and freeze for 20–25 minutes until the exterior is firm. This par-freezing lowers the surface moisture enough that they'll behave closer to shelf-stable gnocchi in the pan. Fully frozen gnocchi should be thawed in the refrigerator overnight and then par-frozen on a sheet pan as described above. Homemade gnocchi, unless par-frozen, has too much surface moisture and tends to fall apart or stick badly when pan-fried directly. For a first attempt at this technique, start with the shelf-stable packaged version — the results are the most consistent and require no extra prep.

Why can't I move or stir the gnocchi while they're cooking?

This is the same principle as searing a steak or getting a proper sear on any protein: the crust forms as the surface proteins and starches undergo the Maillard reaction, which requires sustained, direct contact between the food and the hot surface. As gnocchi cook, the starches on the cut surface of the dough polymerize and bond with the pan surface briefly — this is normal and resolves itself once the crust fully forms. If you move or shake the pan before that crust sets, you break the partial bond, tear the developing crust, and expose wet interior dough — which then steams and prevents re-crisping on that side. The visual cue is reliable: after 4 minutes over medium-high heat, reach under a single gnocchi with a thin spatula. If it resists, it isn't ready. If it lifts cleanly, the crust has formed and you can flip. Set a 4-minute timer and do something else. The urge to check, shake, or stir is strong — resist it. One clean flip produces a golden even crust on both sides. Multiple nervous touches produce a mottled, partially torn surface that looks and tastes like a compromised product.

Can I do crispy gnocchi in an air fryer?

Yes, and it works very well, though the texture is slightly different — more uniformly dry-crispy all over rather than the golden-lacquered sear you get in a pan. For an air fryer: toss shelf-stable gnocchi in 1 tablespoon of olive oil so each piece is lightly coated, spread in a single layer in the basket (don't stack), and air fry at 400°F for 14–16 minutes, shaking the basket at the 8-minute mark. They come out lightly crispy on all sides with a consistent color. The tradeoff: you don't get the same deep golden-brown Maillard crust that develops from sustained contact with a hot oiled surface, and you can't do a sauce-in-the-pan finish the same way. The pan method produces a more visually dramatic result and allows you to finish directly with sage brown butter or garlic olive oil in the same pan without a transfer step. Air fryer is faster and lower-oil — ideal if you want a crispy gnocchi base to toss into a separate sauce.

Why does butter go in after the gnocchi is already crispy?

Butter has a low smoke point (about 300–350°F, depending on how much milk solids it contains) and burns quickly in a pan that's hot enough to properly sear gnocchi. If you start with butter in the pan, by the time the gnocchi goes in and you wait 4 minutes for the crust to form, the butter will have gone past brown butter into burnt, acrid, black-flecked bitterness. The technique sidesteps this entirely: start with olive oil (smoke point ~375–405°F), which handles the high heat of searing without burning. Once both sides of the gnocchi are crispy, push them to the outer edges of the pan (which are slightly cooler), and reduce heat slightly. Drop the butter into the center, add the sage and garlic, and swirl. At this point the pan is hot enough to brown the butter's milk solids within 60–90 seconds — producing the nutty, hazelnut-scented beurre noisette — without burning the olive-oil-crisped gnocchi sitting on the sides. When the butter is deep golden and the sage leaves are crispy, toss everything together. You get the best of both fats: olive oil provides the hard sear, butter provides the finish flavor and the aromatic base for the sage.

What sauces work with crispy gnocchi?

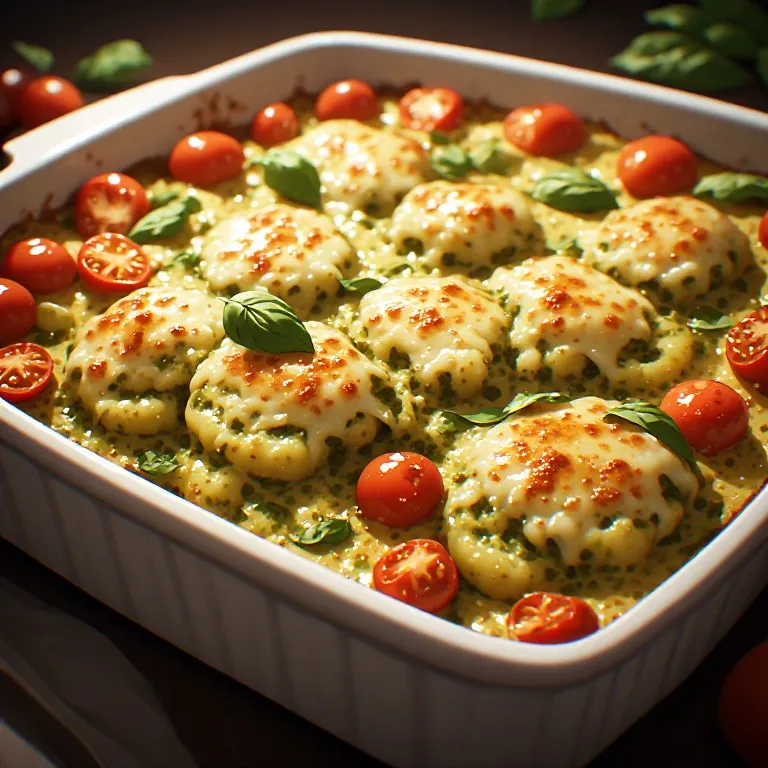
The rule with crispy gnocchi: the sauce goes in after the crust forms, not during. Any wet sauce introduced while the gnocchi is still crisping kills the crust with steam. Once both sides are golden, you have a lot of flexibility. The most popular finishes — all of which work in the same pan — are: (1) Sage brown butter: 4 tablespoons butter + 10 sage leaves + 2 sliced garlic cloves swirled until nutty brown, finished with Parmesan. (2) Garlic olive oil: push gnocchi aside, sauté 4 sliced garlic cloves in the remaining pan oil until golden (about 90 seconds), add a pinch of red pepper flakes and a splash of pasta water, toss. (3) Pesto: pull the pan off heat, add 3–4 tablespoons of good pesto, toss to coat — the residual heat warms the pesto without breaking it. (4) Cherry tomato: add 1 cup halved cherry tomatoes to the pan after flipping the gnocchi for their second side, let them burst and release their juice as the gnocchi finishes — the liquid from the tomatoes deglazes the pan and creates a quick pan sauce. (5) Gorgonzola cream: deglaze with 1/4 cup cream after removing the gnocchi, melt in 2 oz crumbled Gorgonzola, return the gnocchi and toss. All five work. Avoid heavy, long-simmered sauces — the crisp surface absorbs liquid quickly and a heavy marinara will make the gnocchi soggy within 2 minutes.

How is crispy gnocchi different from regular gnocchi?

Regular gnocchi, cooked by boiling, is soft and uniform all the way through — it has a tender, cloud-like texture that clings to sauce and absorbs whatever liquid it's tossed in. That's the intended result: gnocchi as a pasta substitute, a soft vehicle for sauce. Crispy gnocchi is a fundamentally different textural experience: the exterior is a thin, golden, almost crackly shell — you hear it when you bite in — and the interior is distinctly different from the crust, still soft and slightly doughy in the center. The contrast is the whole point. It's closer in concept to a twice-cooked potato — roasted potatoes that go into a hot oven after parboiling to maximize the crust-to-interior contrast. The flavor also changes: the Maillard reaction on the crust produces new flavor compounds (toasted starch, caramelized proteins) that boiling doesn't. A pan-crisped gnocchi with sage brown butter has three distinct flavor layers: the nutty, slightly caramelized crust, the neutral-starchy interior, and the aromatic butter-sage-Parmesan coating. Boiled gnocchi tossed in the same sauce tastes entirely different — softer, more neutral, the sauce flavor dominant rather than the gnocchi itself contributing.

Can I make this with sweet potato gnocchi or cauliflower gnocchi?

Sweet potato gnocchi works well with the pan-frying technique — it crisps in the same way as standard potato gnocchi and the natural sweetness pairs especially well with sage brown butter or a miso-butter finish. Most store-bought sweet potato gnocchi is shelf-stable, so no extra prep needed. Cauliflower gnocchi (notably the Trader Joe's frozen version) is significantly different. It has much higher water content and lower starch, which means it releases a lot of moisture when heated. To get a real crust, you need to: cook it straight from frozen (do not thaw, which adds extra moisture), spread in a single layer in an oiled pan over medium-high heat, and press each piece flat with a spatula — the added surface area helps moisture evaporate faster. The result is crispier than boiled, but the crust is thinner and more fragile than traditional gnocchi, and the texture softer overall. Trader Joe's cauliflower gnocchi is intentionally marketed as a lower-carb swap, not a performance upgrade. If you want the true TikTok crispy gnocchi experience — the hard, audible shell — use shelf-stable standard potato gnocchi.

Love this recipe? Share it!

Free PDF: our 12 most-wanted copycat recipes — instant download.

Made it? Buy us a coffee

Every recipe here is free, with no paywalls. If this one was a hit at your table, a small tip keeps new copycats coming.

$

Ratings & Reviews

—
No ratings yet

Rate this recipe

Click a star to rate

Leave a Review

0/500

CS

Copycat Spices Editorial

Researched + fact-checked. Every recipe on Copycat Spices is built from published sources — official ingredient lists, brand-published recipes, interviews and food-science references — and fact-checked before it goes live, then written as clear, step-by-step instructions for home cooks of all skill levels.

Learn more about our mission →