Pin It

Thomas Keller Roast Chicken (The French Laundry Technique, Made at Home)

Thomas Keller Roast Chicken (The French Laundry Technique, Made at Home)
Jump to Recipe
Prep 20 min (plus 12–24 hr optional fridge dry) Cook 50–60 min Serves 4
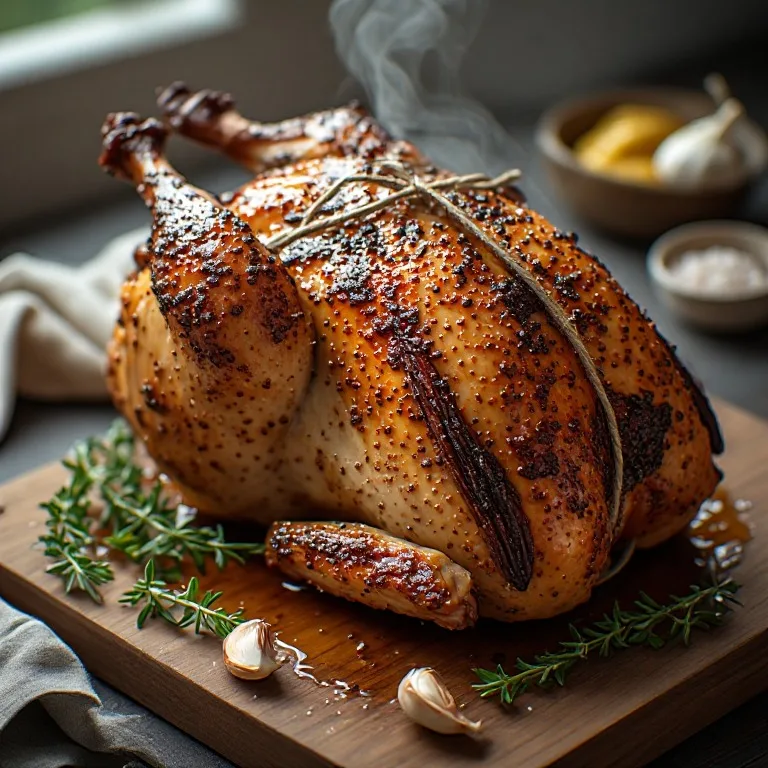
Quick answer: Pat a 2 to 3 lb chicken completely dry with paper towels — better still, leave it uncovered on a rack in the refrigerator for 12 to 24 hours so the skin desiccates further. Season the inside of the cavity generously with kosher salt and freshly ground black pepper, then tuck in a small bunch of thyme and several unpeeled garlic cloves. Truss the bird tightly: cross the legs at the joint and tie with butcher's twine, then pull the twine up alongside the body and tuck the wings underneath. The goal is a compact, nearly spherical shape. Season the outside with kosher salt and freshly ground pepper right before it goes in — do not salt and let it sit, which would draw surface moisture. Roast on a rack in a heavy pan at 450°F for 50 to 60 minutes without opening the oven, without basting, and without adding any liquid to the pan. The bird is done when the skin is a deep mahogany and an instant-read thermometer reads 165°F in the thickest part of the thigh. Rest uncovered on a cutting board for 15 minutes before carving. Do not tent with foil — the steam softens the skin you spent 24 hours drying.

Shop the tools

Gear matched to this recipe. These are Amazon affiliate links — we may earn a small commission if you buy, at no extra cost to you.

As an Amazon Associate, Copycat Spices earns from qualifying purchases. Product images are generic illustrations, not the exact item listed.

Thomas Keller Roast Chicken (The French Laundry Technique, Made at Home)

Thomas Keller's famous roast chicken — 'Mon Poulet Rôti' from the Bouchon cookbook: a dry bird, 450°F straight through, a tight truss, and the courage to leave it alone. No basting. No covering. No liquid in the pan. The most influential roast chicken technique in American cooking, explained step by step.

Medium Prep: 20 min (plus 12–24 hr optional fridge dry) Cook: 50–60 min Total: 25h 20m4 servings ~$4.20/serving
Prep20 min (plus 12–24 hr optional fridge dry)
Cook50–60 min
Total25h 20m
Servings
4
At home~$4.20/serving
vs
Restaurant~$18.90/serving
You save ~78%

The Story Behind the Recipe

Thomas Keller's famous roast chicken — 'Mon Poulet Rôti' from the Bouchon cookbook: a dry bird, 450°F straight through, a tight truss, and the courage to leave it alone. No basting. No covering. No liquid in the pan. The most influential roast chicken technique in American cooking, explained step by step.

Nutrition Facts

Per serving (4 servings)
Calories380
Total Fat22g
Total Carbs0g
Dietary Fiber0g
Sugars0g
Protein42g
Sodium720mg

* Estimated values based on standard recipe preparation. Actual values may vary.

Ingredients

  • The chicken
  • Cavity seasoning
  • Exterior seasoning
  • Equipment note

Instructions

💡
Pro tip: This recipe tastes even better the next day. The flavors need time to meld together in the fridge.
❄️
Storage: Keeps in an airtight container in the fridge for up to 2 weeks. Freezer-friendly for up to 3 months.
🎃 Free Halloween cookbook — download now The Copycat Halloween Cookbook A ready-made, photo-illustrated PDF of our best halloween copycat recipes — free to download, no building required. Pay what you want to support if you love it.

Free PDF — instant download. We'll also send new seasonal copycat recipes now and then; unsubscribe anytime. Or just download it →

Copycat Thomas Keller Roast Chicken (The French Laundry Technique, Made at Home)

Prep time: 20 min (plus 12–24 hr optional fridge dry)
Cook time: 50–60 min
Serves: 4


Thomas Keller’s roast chicken is not a complex recipe. It is three requirements with no shortcuts: a completely dry bird, an oven set to 450°F and left there, and a tight truss that turns the chicken into a compact oval. That is the French Laundry technique — restraint enforced by precision.

The recipe — “Mon Poulet Rôti,” which Keller calls his favorite simple roast chicken — appears in the Bouchon cookbook (2004) and is a signature dish at his bistro of the same name. Food writers have called it the definitive home roast chicken for two decades. It is not difficult. What it requires is doing less than instinct tells you to do: no basting, no liquid in the pan, no temperature reduction, no foil tent over the resting bird. The chicken does the work if you let it.


Three Things Most Roast Chicken Recipes Get Wrong

1. They start with a wet bird

Moisture on the skin creates steam inside the oven. Steam prevents browning. A chicken taken straight from its plastic packaging is wet — from the packaging liquid, from handling, from condensation. Patting dry with paper towels helps, but a 12 to 24-hour rest on a rack in an uncovered refrigerator takes it further: the cold, circulating air of the refrigerator desiccates the skin until it feels almost papery. At 450°F, a fully dried bird begins browning within the first few minutes. A wet bird spends most of the first 20 minutes of cooking driving off that surface moisture before any browning can happen — and by then the clock is working against you.

2. They reduce the oven temperature

The most common instinct with roast chicken is to start hot and reduce, or to cook at 375°F throughout because a higher temperature seems risky with a whole bird. Keller’s method maintains 450°F from start to finish, with no reduction. The high temperature does two things simultaneously: it caramelizes the skin surface rapidly (creating what looks and tastes close to a rotisserie crust) and it drives heat into the interior faster than a low oven, which means less total time before the breast dries out. The catch is size — this only works on a bird under 3½ lbs, where the geometry allows the interior to cook in the time the exterior can sustain that heat. For a larger bird, 450°F is genuinely dangerous; for the right bird, it is the correct temperature.

3. They do not truss properly

Trussing is not for appearances. An untrussed chicken roasts unevenly because its shape is uneven: the wings stick out and overcook, the gap between thigh and body is poorly shielded, the wingtips char while the inner thigh is still underdone. A tightly trussed chicken is essentially a sphere. Hot air in the oven circulates uniformly around a sphere. Every surface gets the same exposure — the thickest joint (where thigh meets body) is not protected anymore; the breast is not uniquely exposed. The Keller truss pulls the legs together until they cross, tucks the wings flat behind the body, and ties everything snug. The first time you do it will be awkward. By the third time it takes under a minute.


About the Recipe

Thomas Keller opened The French Laundry in Yountville, California in 1994. It has held three Michelin stars continuously since the Michelin guide first covered the US, and it is widely considered one of the most technically precise kitchens in American cooking. Bouchon, his French bistro next door, is where this chicken lives — a simple, family-style room built around exactly the kind of unfussy cooking Keller says he most likes to eat at home.

The roast chicken in the Bouchon cookbook is Keller teaching the most fundamental technique in European cooking — a whole bird in a hot oven — stripped of everything unnecessary. The recipe has no marinade, no stuffing under the skin, no compound butter, no basting liquid. The skill is not in the additions; it is in understanding exactly what the bird needs and providing nothing more.


How This Compares to the Zuni Cafe Method

The two most-taught home roast chicken techniques in American cooking are Judy Rodgers’ Zuni Cafe method and this one. They disagree on almost every technique decision and both produce excellent results:

Thomas Keller (French Laundry)Judy Rodgers (Zuni Cafe)
Advance saltingSalt the cavity; season exterior at the last minuteSalt 1–3 days in advance, deeply
Temperature450°F constant throughout475°F, preheated skillet or cast iron
Pan liquidNoneNone
BastingNoneNone
RestUncovered 15 minUncovered 10 min
ResultCrackle skin, clean chicken flavorDeeply seasoned, complex, more juicy

If you have 3 days: the Zuni method. If you have 24 hours or less: Keller’s. Both are worth learning.


Tips From The First Few Times

The chicken will look alarming at 45 minutes. The skin will be a deep, reddish-brown that looks like it might be burning. It is not burning. That color is what you want. Do not reduce the temperature; do not open the oven. Trust it.

The garlic cloves are incidental but good. After resting, the garlic inside the cavity will have roasted into sweet, jammy paste. Squeeze the cloves from their skins and spread on bread or stir into the pan drippings as a bonus condiment.

The size of the bird matters more than you think. A 2¾ lb fryer and a 4 lb roaster are not the same recipe at 450°F. If your grocery store only carries 4 to 5 lb birds, buy two smaller birds (or ask the butcher specifically for “fryers”) — or drop the temperature to 400°F for the larger bird and adjust time.
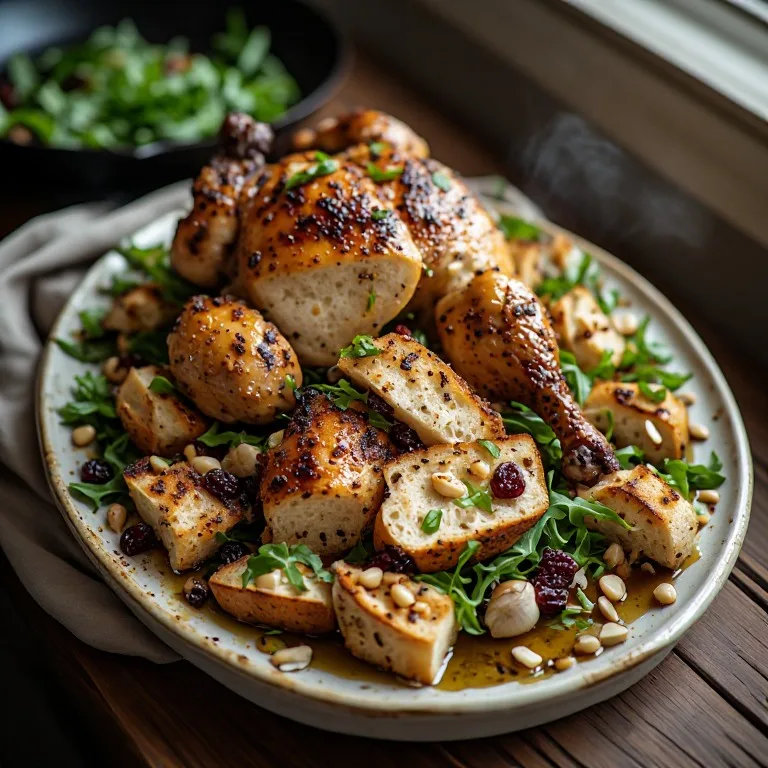
🥗

Make It Healthier

Love Thomas Keller Roast Chicken (The French Laundry Technique, Made at Home) but want a lighter version? Try these simple swaps:

  • ✓Remove the skin before eating — the skin accounts for roughly 120 to 130 calories and most of the saturated fat per serving. The meat underneath is naturally lean, particularly the breast. A skinless thigh and drumstick from this chicken has roughly 200 calories and 28g of protein per serving.
  • ✓The garlic cloves roasted in the cavity become soft, sweet, and spreadable — squeeze them from their skins and spread on bread instead of butter for a zero-added-fat accompaniment that uses something that would otherwise be discarded.
  • ✓The pan drippings, while flavorful, are mostly rendered fat — if you are watching saturated fat, spoon them over the chicken lightly or skip and use the chicken's natural moisture. The meat from a properly cooked small bird is juicy enough to eat without any sauce.

Frequently Asked Questions

What makes Thomas Keller's roast chicken different from every other version?

Three things, and they work together. First, the bird is as dry as possible before it ever sees heat. Keller's published instruction is blunt — rinse the chicken, then 'dry it very well with paper towels, inside and out,' because 'the less it steams, the drier the heat, the better.' Most cooks take this a step further by air-drying the chicken uncovered on a rack in the refrigerator for 12 to 24 hours, which desiccates the skin even more. Moisture on the surface creates steam in the oven, and steam prevents browning. A wet chicken takes most of its cook time to drive off that moisture before any crisping can happen. A pre-dried bird starts browning within the first few minutes at 450°F. Second, the oven is 450°F for the entire cook — not 375°F with a blast at the end, not 450°F reduced to 350°F after the first twenty minutes. The sustained high heat caramelizes the skin, creates a faint crackle on the exterior, and cooks the interior faster than the breast can dry out, provided the bird is the right size (under 3½ lbs). Third, the truss is genuinely tight. This is not decorative. A compactly trussed chicken is essentially spherical, and a sphere roasts evenly: the hot air circulates uniformly around every surface. An untrussed chicken has irregular exposed areas — the gap between thigh and body, the wingtips sticking out — that overcook while the shielded inner thigh is still underdone. These three things are each simple. Together they produce a result that most home cooks have never achieved from their own oven.

Why does Keller use such a small chicken? Can I use a 5 or 6 pound bird?

Keller is explicit about size: his recipe calls for a small bird, 2 to 3 lbs. The reason is thermodynamic. At 450°F, a 3-lb bird reaches a safe internal temperature in roughly 50 to 60 minutes — short enough that the breast does not dry out before the thighs are cooked. A 5 or 6 lb bird at 450°F will have its breast overcooked and drying by the time the thighs reach temperature, because the larger mass requires more time to cook through, and more time under that much heat means desiccation. If you want to cook a larger bird, drop the temperature to 400°F and add roughly 10 minutes per pound from the 3.5 lb baseline — but understand you are now doing a different recipe that produces a different result. The Keller method is designed around a specific bird size. You can buy smaller birds from butchers, farmers markets, or by asking grocery stores to order 'fryer' chickens specifically. The best roast chickens in French cooking tradition have always used younger, smaller birds — this is part of what makes a French bistro roast chicken different from a typical American supermarket-size bird.

What is the correct way to truss a chicken in the Keller method?

The goal is to end up with a compact, oval shape: legs crossed and tied close to the body, wings tucked flat underneath so they do not point upward. The method: cut a 24-inch piece of butcher's twine. Place the chicken breast-side up. Slide the center of the twine under the tail end of the bird. Bring both ends up alongside the body and cross them over the top of the tail. Now loop each end under the end of the corresponding drumstick, pulling the legs together so they cross at the joint and come slightly toward the body — the leg-tip crossing is what creates the compact profile. Tie a tight knot to hold the legs together and crossed. Bring the remaining twine along each side of the bird toward the neck end. Tuck the wings underneath the bird (fold each wing tip behind and under the shoulder) — this keeps the wingtips from burning and closes the shoulder gap. Tie the twine across the top of the breast to secure the position. The result should look like the chicken is sitting firmly with no gaps, legs crossed close, body tight. If you pick it up, it should feel solid, not floppy. Watch a trussing video the first time; it becomes fast with practice.

Why does Keller say not to tent the chicken with foil while it rests?

Tenting traps steam released by the hot meat. That steam condenses on the underside of the foil and drips back onto the skin, softening the very crust you spent effort developing. After 50 to 60 minutes at 450°F, a well-dried, well-trussed chicken has crackling, paper-thin skin. Five minutes under a foil tent will meaningfully soften it. At the temperature a properly rested chicken holds — 160°F and carryover rising slightly — it does not need the extra insulation that a foil tent provides. Just put it on a cutting board and leave it alone for 15 minutes. The interior temperature will redistribute, the juices will stabilize, and the skin will stay crisp. This is a small-seeming detail that makes a large difference in the final dish.

Should I salt the outside of the chicken in advance or right before roasting?

Right before roasting. This is the counterintuitive element of the Keller method. For most proteins, salting in advance is an advantage — a dry brine seasons deeper into the meat and draws out moisture that then reabsorbs. For this chicken, where the goal is maximum surface dryness at the moment it enters the oven, salting ahead and then waiting would pull moisture from the interior to the surface and partially undo the work of the fridge dry. Salt the cavity generously (where it can season the meat from the inside without affecting surface moisture), but salt the outside only in the final few minutes before the bird goes in. At 450°F, the salt dissolves almost instantly and the crust forms quickly regardless — you do not need the advance salting that lower-temperature roasting relies on.

What should I do with the pan juices?

The pan juices from a properly executed Keller chicken are essentially a complete sauce without any further work: deeply browned, intensely flavored drippings from the rendered fat and caramelized skin, with no water added during cooking to dilute them. Tilt the roasting pan and collect the juices with a spoon. Skim the excess fat if you prefer (or not — chicken fat is delicious). Spoon the drippings directly over the carved pieces at the table. If you want a slightly more elaborate sauce, set the roasting pan over a burner on medium-high, add a splash of dry white wine or chicken stock, and scrape up the fond — the concentrated bits of browned dripping on the pan floor. This produces a simple pan jus in about two minutes. Keller's actual recipe calls for minimal intervention: the pan juices alone are the sauce, and the restraint is appropriate to the spirit of the dish.

What should I serve with this chicken?

The dish is intentionally spare. Keller serves it simply: a roasted chicken with the pan drippings, nothing on the plate competing with it. At Bouchon it comes with a simple green salad or frites; at home, classic companions include a green salad with vinaigrette, roasted potatoes cooked in the same high oven, or a seasonal vegetable — spring peas, haricots verts, or roasted root vegetables in winter. The elevated fat content from a well-rendered bird means you do not need a heavy starch alongside. If you want a potato, cook them at 425°F in a separate pan with olive oil and salt; they will be done by the time the chicken rests. Crusty bread for the pan drippings is never wrong. For a more elaborate table, the chicken pairs with a simple green salad dressed with a shallot vinaigrette, a cold glass of Burgundy or a light Chardonnay, and the understanding that sometimes the most refined thing you can serve is something that looks deceptively plain.

How is this different from the Zuni Cafe roast chicken?

These are the two most famous home-cook roast chicken techniques, and they reach a similar destination by opposite roads. Judy Rodgers' Zuni Cafe method calls for a long, cold, dry-brine — the bird is salted 1 to 3 days in advance, which draws moisture out of the flesh, reabsorbs it as a brine, and produces a deeply seasoned, juicy interior. The bird is roasted in a wood-fire oven originally; at home, a very hot oven (475°F) is used in a preheated skillet. Keller's method relies on surface desiccation alone (no salt cure), a tight truss, and a sustained 450°F with no searing step. The Zuni bird produces a more deeply salted, more evenly seasoned result with the interior flavored throughout. The Keller bird produces a crisper skin with cleaner chicken flavor — more austere. Both are excellent. If you have 1 to 3 days, the Zuni method produces the more complex result. If you have 12 to 24 hours (or less), Keller's dry-oven technique produces extraordinary skin with less lead time.

Love this recipe? Share it!

Free PDF: our 12 most-wanted copycat recipes — instant download.

Made it? Buy us a coffee

Every recipe here is free, with no paywalls. If this one was a hit at your table, a small tip keeps new copycats coming.

$

Ratings & Reviews

—
No ratings yet

Rate this recipe

Click a star to rate

Leave a Review

0/500

CS

Copycat Spices Editorial

Researched + fact-checked. Every recipe on Copycat Spices is built from published sources — official ingredient lists, brand-published recipes, interviews and food-science references — and fact-checked before it goes live, then written as clear, step-by-step instructions for home cooks of all skill levels.

Learn more about our mission →