
Pin It

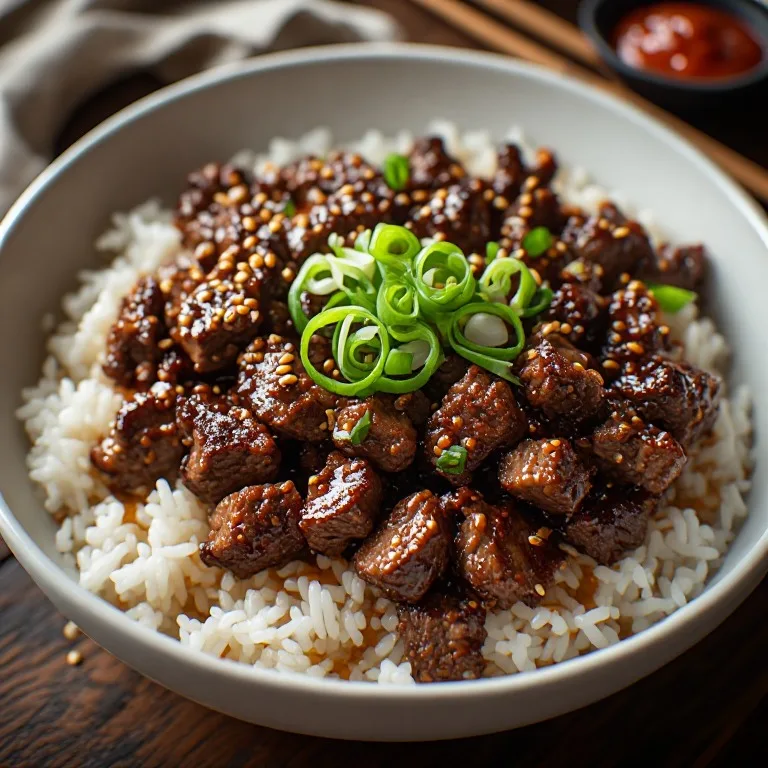
Viral TikTok Ground Beef Bowl (Korean-Style Soy-Sesame Glaze + Crispy Shallots)

Viral TikTok Ground Beef Bowl (Korean-Style Soy-Sesame Glaze + Crispy Shallots)
Jump to Recipe
Prep 10 min Cook 20 min Serves 4
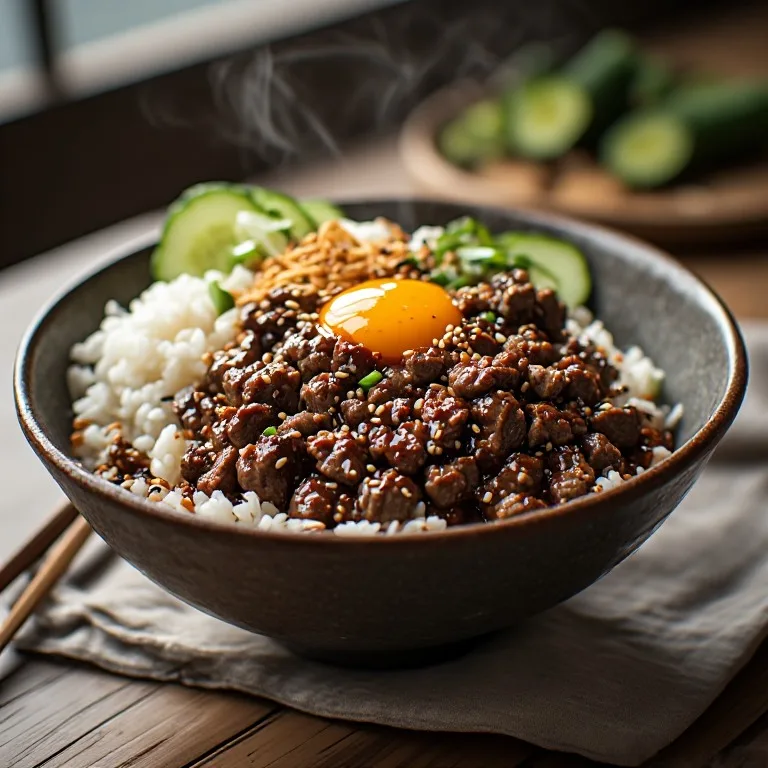
Quick answer: Soft-boil 4 eggs (7 minutes in boiling water from cold, ice bath immediately — this produces a jammy set-edged yolk; reduce to 6 minutes if you prefer a looser center). Thinly slice 2 shallots and fry in 3 tbsp neutral oil at 350°F for 4–5 minutes until deep golden — drain on a paper towel. Mix the sauce: ¼ cup (4 tbsp) low-sodium soy sauce, 3 tbsp brown sugar, 1 tbsp rice vinegar, 1 tsp gochujang paste, ½ tsp red pepper flakes. Brown 1 lb ground beef (85/15) over medium-high heat, breaking it into small pieces. When no pink remains, tilt the pan and spoon off all but 1 tablespoon of fat — that tablespoon stays. Add 4 minced garlic cloves and 1 tsp grated fresh ginger directly to the beef, stir 30 seconds. Pour in the sauce and toss over high heat for 90 seconds until the liquid has cooked off and every piece of beef is coated in a shiny glaze. Remove from heat and drizzle in 1 tbsp sesame oil. Divide 4 cups cooked jasmine rice across 4 bowls. Spoon glazed beef over rice. Top each bowl: halved soft-boiled egg, crispy shallots, 1 tsp sesame seeds, sliced green onion, and thin cucumber half-moons. Serves 4 at roughly 600 calories and 33g protein per bowl.

Viral TikTok Ground Beef Bowl (Korean-Style Soy-Sesame Glaze + Crispy Shallots)

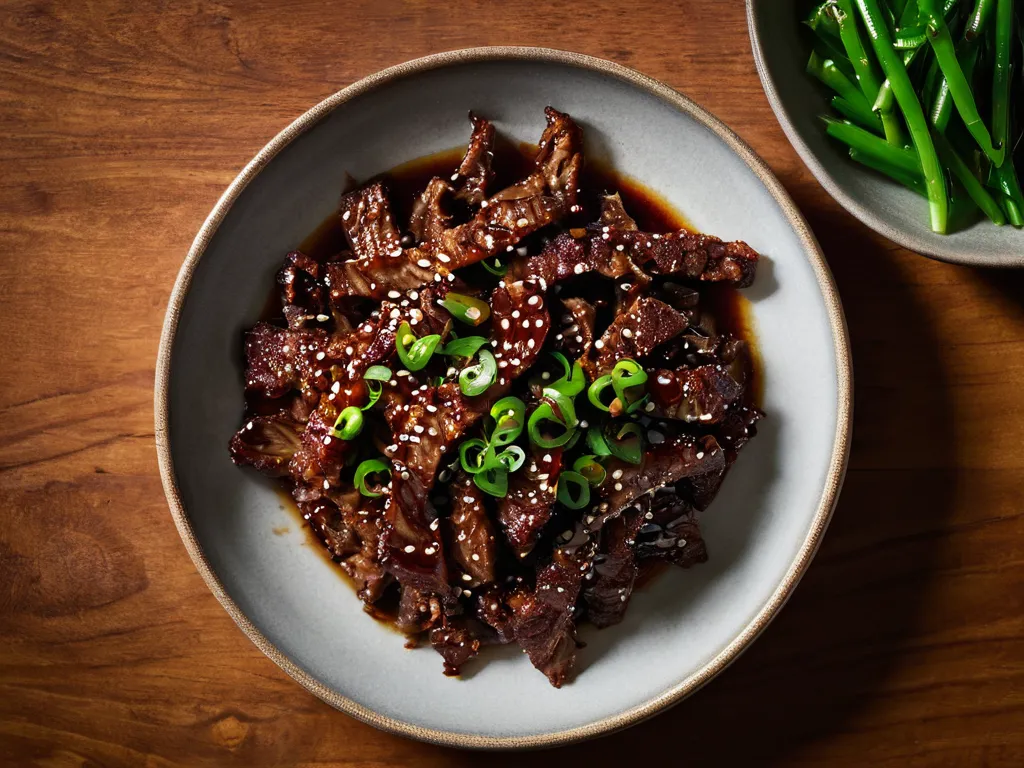
The Korean-style ground beef bowl blowing up on #MealPrep TikTok: 1 lb of ground beef glazed in a sticky soy-sesame-ginger sauce, served over jasmine rice with a jammy 7-minute egg and crispy shallots. 20 minutes, 4 bowls, $12 total — here's the glaze rule and the egg timing that make it work.

Easy Prep: 10 min Cook: 20 min Total: 30 min4 servings ~$4.50/serving
Prep10 min
Cook20 min
Total30 min
Servings
4
At home~$4.50/serving
vs
Restaurant~$20.25/serving
You save ~78%

The Story Behind the Recipe

The Korean-style ground beef bowl blowing up on #MealPrep TikTok: 1 lb of ground beef glazed in a sticky soy-sesame-ginger sauce, served over jasmine rice with a jammy 7-minute egg and crispy shallots. 20 minutes, 4 bowls, $12 total — here's the glaze rule and the egg timing that make it work.

Nutrition Facts

Per serving (4 servings)
Calories600
Total Fat23g
Total Carbs52g
Dietary Fiber2g
Sugars8g
Protein33g
Sodium840mg

* Estimated values based on standard recipe preparation. Actual values may vary.

Ingredients

  • For the crispy shallots (make first)
  • For the soft-boiled eggs
  • For the Korean beef glaze
  • For the bowls

Instructions

💡
Pro tip: This recipe tastes even better the next day. The flavors need time to meld together in the fridge.
❄️
Storage: Keeps in an airtight container in the fridge for up to 2 weeks. Freezer-friendly for up to 3 months.
🎃 Free Halloween cookbook — download now The Copycat Halloween Cookbook A ready-made, photo-illustrated PDF of our best halloween copycat recipes — free to download, no building required. Pay what you want to support if you love it.

Free PDF — instant download. We'll also send new seasonal copycat recipes now and then; unsubscribe anytime. Or just download it →

Viral TikTok Ground Beef Bowl — Korean-Style Soy-Sesame Glaze, Jammy Egg, Crispy Shallots

Prep: 10 min | Cook: 20 min | Serves: 4 | Difficulty: Easy

Korean-style ground beef bowls have become the definitive #MealPrep TikTok format for fall 2026 — 4 bowls in 20 minutes, under $12 for the whole batch, and north of 30g of protein per serving. The recipe is deceptively simple but has one technique that separates the versions that work from the versions that produce gray beef swimming in watery sauce.

The rule: when the beef is cooked, drain all but 1 tablespoon of fat before adding the sauce. That tablespoon emulsifies the soy-sugar-sesame glaze so it coats every piece instead of pooling at the bottom of the pan.

The visual: a jammy 7-minute soft-boiled egg, halved at the yolk, on top of sticky glazed beef. That’s the shot that’s driven millions of TikTok saves.

Why This Recipe Works

Ground beef is the weeknight workaround for bulgogi — it hits the same Korean flavor notes (soy, sesame, ginger, garlic, gochujang) without the 30-minute marinade and expensive thinly-sliced beef. The browning step matters: a properly hot pan with room for the beef to sear (not steam) produces pieces with browned edges that hold sauce better than gray, wet beef.

The crispy shallots are the upgrade that separates TikTok versions from the older recipe-blog versions. Five minutes to make, lasts one hour before going limp — so make them last, right before assembly.

The 7-Minute Egg

This is the entire visual of the dish on TikTok. Cold egg, boiling water, 7 minutes, ice bath. Peel right before serving. The yolk should be set at the edges and still soft and glossy at the center — if you cut it and it runs completely, it needed 30 more seconds; if the yolk is fully solid, it needed 30 fewer.

The ice bath isn’t optional. Eggs continue cooking from residual heat after you pull them from boiling water, and the difference between 7 minutes in water plus 3 minutes cooling on the counter and 7 minutes in water plus 5 minutes in an ice bath is meaningful.

The Sauce Reduction: What to Watch For

The sauce has four ingredients: soy sauce (salt and umami), brown sugar (sweetness and caramelization), rice vinegar (brightness that prevents the sweetness from going flat), and gochujang (fermented heat). These go in together over high heat and should reduce to a glaze in 60–90 seconds.

What glazed looks like: no liquid pooling in the pan, every piece of beef has a visible shiny coating, and when you scrape a spatula through the beef, it trails briefly instead of leaving a puddle.

What too far looks like: sticky-dry, almost burnt-smelling, beef starting to stick in clumps. If you see this, add 2 tablespoons of water to the pan immediately and toss.

The sesame oil goes in off heat, always. The aromatic compounds in sesame oil that make it taste the way it does evaporate at cooking temperatures — it’s a finishing oil, not a cooking fat.

Crispy Shallots: The 5-Minute Upgrade

Thinly sliced shallots fried in neutral oil until deep amber-gold. They go limp in contact with moisture within 10 minutes, so they always go on at the very last second — right before the bowl hits the table, not when you’re assembling four bowls at once. Make them first so they’re ready, add them last.

The shallot oil left in the pan after you drain them: don’t throw it out. It’s infused with shallot flavor and excellent for the next time you need a neutral oil with some depth.

Meal Prep Notes

This is genuinely one of the best meal-prep-friendly recipes on TikTok because the beef reheats nearly as well as it was originally cooked. Store the beef and rice in separate containers — mixed together in the fridge, the rice absorbs the sauce overnight and turns gummy. The eggs keep 3 days peeled in cold water. Make the crispy shallots fresh each time (5 minutes).

For 5 days of lunches from one batch: double the beef recipe (2 lbs), make 8 cups of rice, boil 5 eggs. Total time: 30 minutes. Total cost: roughly $20 for ingredients at current prices.
🥗

Make It Healthier

Love Viral TikTok Ground Beef Bowl (Korean-Style Soy-Sesame Glaze + Crispy Shallots) but want a lighter version? Try these simple swaps:

  • ✓Swapping ground beef for 93/7 lean ground beef saves roughly 100 calories per serving and cuts saturated fat significantly. The sauce still works, but the glaze doesn't form quite as cleanly — compensate by adding 1 teaspoon of avocado or neutral oil to the pan before the sauce to give it something to emulsify with.
  • ✓The soft-boiled egg adds 6g of protein for 78 calories — one of the best protein-per-calorie additions in a bowl context. If you're cutting calories, it's not the place to cut; swap the white rice for cauliflower rice instead (105 calories vs 206 per cup, nearly identical in volume).
  • ✓Brown sugar is the primary sugar source — the recipe calls for 3 tablespoons across the whole batch. Cutting it to 2 tablespoons still produces a balanced glaze because the soy and sesame carry enough flavor that the sauce doesn't need maximum sweetness. This saves roughly 12 calories and 3g sugar per serving.
  • ✓The sodium in this bowl is primarily from soy sauce — the recipe uses ¼ cup (4 tablespoons) low-sodium soy across 4 servings, so about 1 tablespoon per bowl. Swapping to coconut aminos (roughly half the sodium of low-sodium soy, tablespoon for tablespoon) drops the sodium noticeably without losing umami depth — coconut aminos are slightly sweeter, so reduce the brown sugar by ½ tablespoon to compensate. Tamari is a like-for-like swap on sodium but keeps the dish gluten-free.

Frequently Asked Questions

Why does my sauce pool at the bottom instead of coating the beef?

Either the beef was drained too completely (no fat left to emulsify the sauce) or the heat wasn't high enough during the reduction step. The sauce needs high heat to reduce quickly — medium heat lets it sit wet and steam the beef rather than glaze it. The fix: make sure 1 tablespoon of fat remains in the pan after draining, and crank the heat to high when the sauce goes in. Toss aggressively for 60–90 seconds and don't walk away. If the sauce still won't reduce (sometimes this happens with very lean beef), add a ½ teaspoon cornstarch mixed into 1 teaspoon water and toss it in during the last 30 seconds — it will bind the sauce immediately.

How do I get a jammy yolk instead of a runny or fully cooked one?

7 minutes in actively boiling water, cold eggs lowered in with a spoon, ice bath immediately. The variables that break this: water that's at a simmer rather than a full boil (the heat conduction is slower and the timing shifts), room-temperature eggs (they cook faster than cold ones, so 7 minutes produces something closer to 7.5 minutes of cold-egg timing), and not using the ice bath (the eggs continue cooking from residual heat after you pull them — the ice bath stops that immediately). At altitude (above 3,500 feet), increase the time to 8 minutes because water boils at a lower temperature.

Can I meal prep this for the whole week?

Yes, and this is actually one of the best meal-prep recipes in terms of reheating quality. The beef and sauce reheat almost perfectly in a skillet or microwave (90 seconds on high with a damp paper towel over the bowl keeps it from drying out). Store: beef in one container (4 days in the fridge), rice in a separate container (4 days — mixing them together makes the rice gummy), eggs peeled and stored in cold water (3 days; don't microwave eggs in their shells). The crispy shallots are the one component that doesn't store — they go limp within an hour in contact with moisture, so make them fresh each day or right before eating. It takes 5 minutes and is worth it.

Is this actually Korean food, or just Korean-inspired?

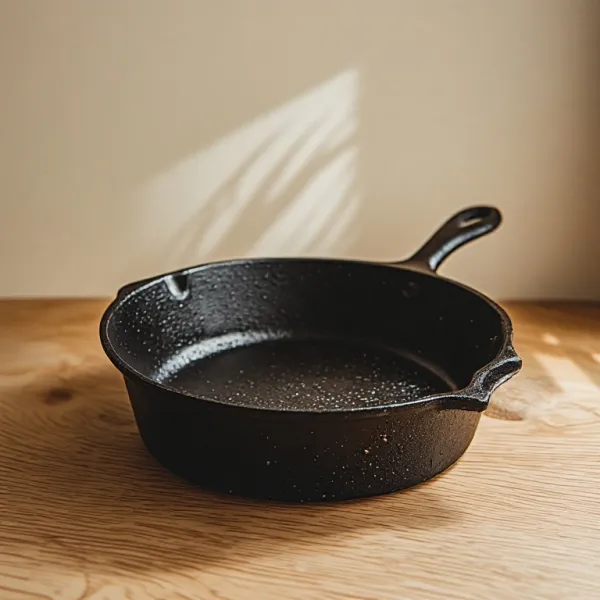
Korean-inspired. The flavor profile — soy, sesame, garlic, ginger, gochujang — is drawn from Korean cooking, and it's commonly described as a simplified take on bulgogi (Korean BBQ beef) made with ground beef instead of thinly sliced. Authentic bulgogi uses thinly sliced beef marinated for hours, cooked on a grill or cast iron. This is the TikTok-adapted weeknight version: faster, cheaper, easier, made with ingredients that are in most American grocery stores. It won't be confused with restaurant Korean food, but the flavors are genuine and the gochujang in particular is a real Korean ingredient that's not a shortcut.

What can I substitute for gochujang?

Sriracha is the closest widely available substitute — use the same 1 teaspoon amount. The flavor shifts: gochujang has a fermented, slightly smoky depth that sriracha doesn't have (sriracha is hotter, garlicier, and more one-dimensional in heat). Sambal oelek works similarly. For no heat, omit entirely — the dish is still good, just milder. If you want to buy gochujang for the first time, the CJ Haechandle brand in a red tub is widely available in Asian grocery stores and Whole Foods; it keeps for 6 months in the fridge.

How is this different from Mongolian beef?

The main differences are protein cut and sauce composition. Mongolian beef uses thinly sliced flank steak (often cornstarch-coated for crispiness) in a soy-brown sugar sauce that's heavier and more syrup-like. This ground beef bowl uses minced beef with a lighter, more balanced sauce that includes rice vinegar (brightness), gochujang (fermented heat), and sesame oil (nutty aroma) — the rice vinegar and gochujang are specifically Korean pantry items that don't appear in Mongolian beef. Ground beef is also 60–70% cheaper per pound than flank steak and requires no slicing. The bowl format with rice, egg, and fresh toppings is more like a Korean bibimbap-influenced assembly; Mongolian beef is typically served as a sauced protein over rice without the additional toppings.

My beef went gray and steamed instead of browning. What did I do wrong?

Crowded pan and/or too low heat — both produce the same result. Ground beef releases a significant amount of water as it cooks. In a properly hot, uncrowded pan, that water evaporates immediately and the surface browns (Maillard reaction requires surface temperature around 280°F, which only happens when there's no moisture present). In a crowded or cool pan, the water can't evaporate fast enough, the beef steams in its own liquid, and the surface never gets hot enough to brown. Fix: heat the pan until it just starts to smoke before adding the beef, and press it into a single layer — don't stir for the first 90 seconds. If you're doubling the recipe, cook the beef in two batches.

Love this recipe? Share it!

Free PDF: our 12 most-wanted copycat recipes — instant download.

Made it? Buy us a coffee

Every recipe here is free, with no paywalls. If this one was a hit at your table, a small tip keeps new copycats coming.

$

Ratings & Reviews

—
No ratings yet

Rate this recipe

Click a star to rate

Leave a Review

0/500

CS

Copycat Spices Editorial

Researched + fact-checked. Every recipe on Copycat Spices is built from published sources — official ingredient lists, brand-published recipes, interviews and food-science references — and fact-checked before it goes live, then written as clear, step-by-step instructions for home cooks of all skill levels.

Learn more about our mission →